
Community listing page, reviews here may not be monitored by the author.
Igrium's Replay Exporter

No reviews yet
An addon to the Replay Mod that allows it to export into Blender and other 3D software.
Community voices
Reviews
No reviews yet. Be the first to review this project!
Get it on
Available Platforms
Compatibility
Supported Environments
Runs entirely on the client. Works on vanilla servers.
About
Project Details
For authors
Embed Badge
If you're the author of this project, you can embed a live badge anywhere that supports HTML or Markdown. It updates automatically whenever ratings change.
Use HTML for any page that supports it, or Markdown for README files and Markdown-based descriptions.
Identifiers
Platform IDs
About
Description
An addon for the Replay Mod that allows you to export your replays into Blender.
This mod is designed for experienced Blender users! It is designed to export your Minecraft scene, and nothing more.
Example:
Usage
Exporting
To begin, open Minecraft and record the replay you wish to export. If you don't know how to do that, this mod is not for you. Then, open the replay editor and add at least two time and camera keyframes. These will determine the start and end points of your animation.
Warning: nether portals and other forms of cross-dimension travel are not supported. Use multiple exports you intend on doing that.
Once you're happy with your replay, open the render screen and click "Export Replay File":
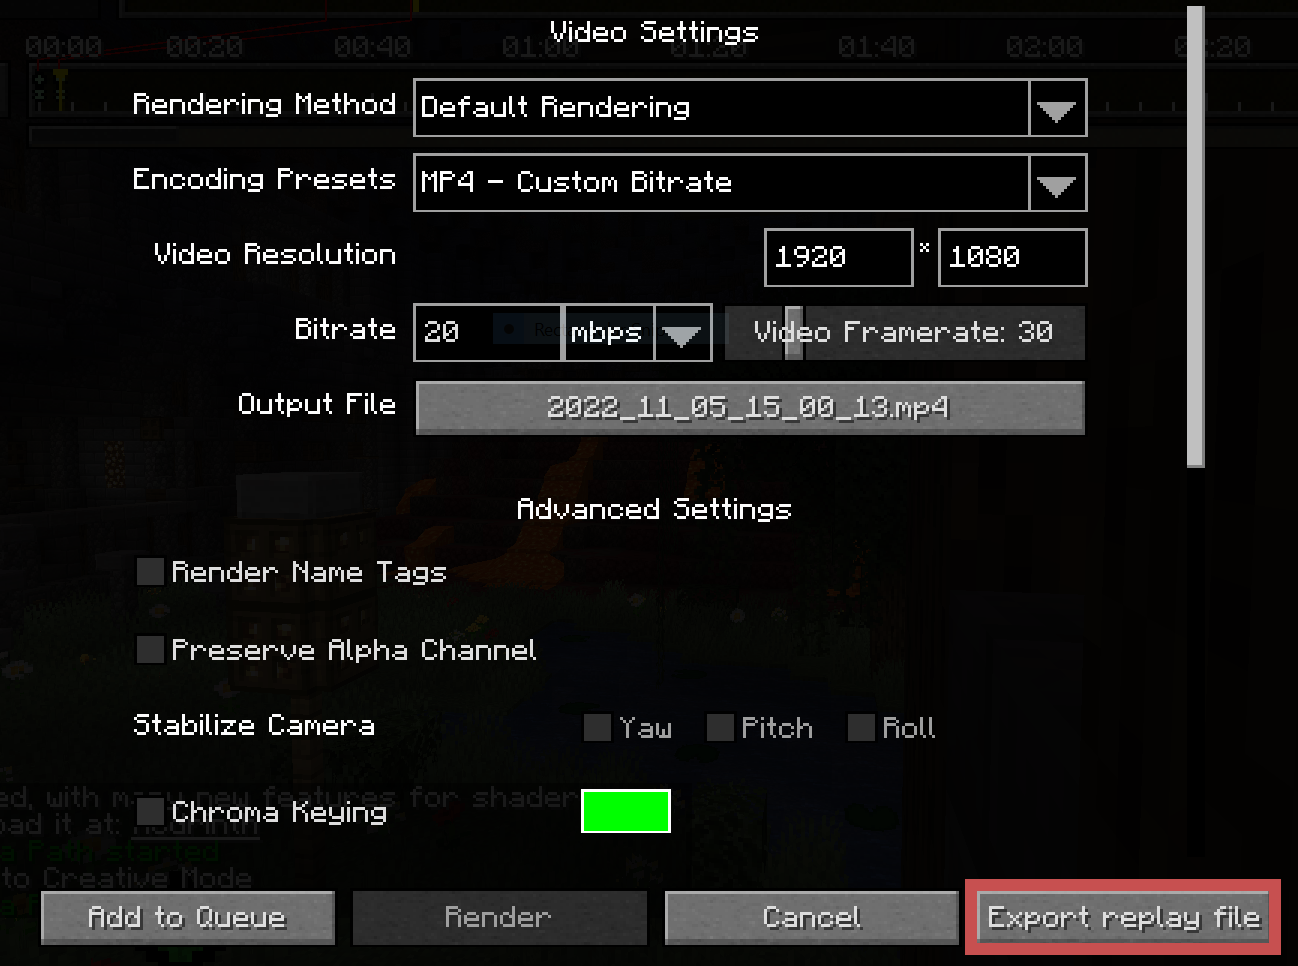
This will open a screen for you to select an output file and configure some replay settings. Adjust your bounds to be as tight as possible. Raise the lower depth as high as it will go before it cuts off the visible landscape, and reduce the perimeter depending on your planned shot.
The "Block Updates" and "Entities" regions add significantly more overhead than the "World" region, so it's recommended to tighten those even further.
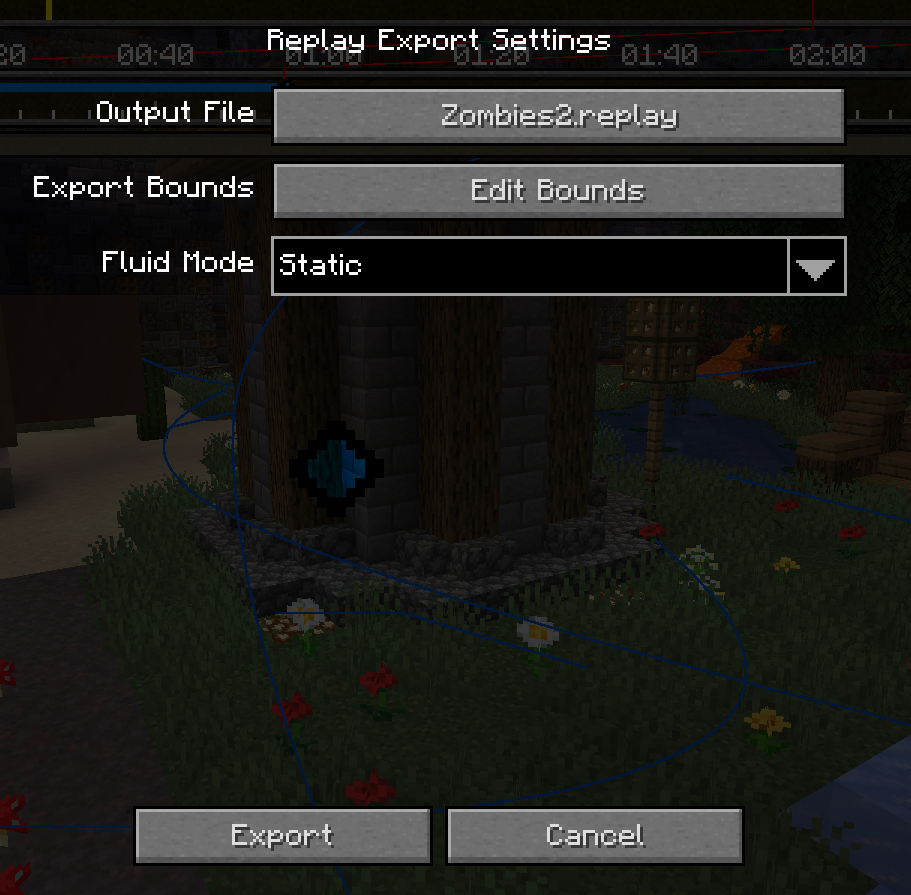

Once you're ready, click the "Export" button at the bottom left and wait for it to complete. It is common for the window to appear frozen while the initial block world is captured.
Importing
After exporting from Minecraft, you should be left with a .replay file, which can be imported into Blender using the provided addon.
Once you've ensured the addon is installed, create a new project and go to File > Import > Minecraft Replay File (.replay). Navigate to your file, but before you import it, note the settings on the right:
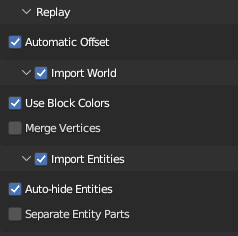
The main two you need to worry about are World and Entities. While you usually want to import both, they each can take quite a bit of time, so it may be useful to disable one or the other.
Everything else can be left as default.
Once you're ready, click "Import Minecraft Replay" at the bottom. Blender will appear to hang for a few minutes. Don't worry; this is because the contents of a Minecraft world is quite large, and Blender provides no (reliable) way to update the UI while it is processing. (It might do to enable the system console to monitor progress.)
Once it is finished importing, you should have a Minecraft world and most of its entities in your scene! If something goes wrong, make sure to submit a bug report!
Screenshots
Gallery
Versions
Files
Relations
Project Relations
More like this
Similar Mods
Suggestions use data such as tags, dependencies, dependents, descriptions, titles, and more to rank how much they overlap with this mod.
On ModDex
Community snapshot
By the numbers
Statistics

Want to reach Minecraft players?
We're looking for a server hosting partner to feature here and other parts of the site. Interested? Send us a message!
Get in touchGet it on
Available Platforms
On ModDex
Community snapshot
By the numbers