Community listing page, reviews here may not be monitored by the author.
UNU Template Pack

No reviews yet
Templates for making your own skin pack for MTS / IV
Community voices
Reviews
No reviews yet. Be the first to review this project!
Get it on
Available Platforms
About
Project Details
For authors
Embed Badge
If you're the author of this project, you can embed a live badge anywhere that supports HTML or Markdown. It updates automatically whenever ratings change.
Use HTML for any page that supports it, or Markdown for README files and Markdown-based descriptions.
Identifiers
Platform IDs
Resources
External Links
About
Description



This template pack allows you to easily create your own vehicle skins and publish your own Immersive Vehicles skin pack!
The benefit of making a skin pack is that you don't have to worry about stealing models, updating json files, or anything! All that is handled by the mod that has the original vehicle, you just make the skin!
This pack currently includes templates for the UNU Parts Pack, UNU Civilian Pack, with the original model textures I use to make different paint schemes and interiors! (which is why the textures are so funky)
How to set up your own Immersive Vehicles skin pack (video coming soon):
- Decide on a packid, make sure it's unique, all lowercase, and does not have any spaces.
- Open the .jar (you can rename the .jar to a .zip, or extract it) and open the assets folder.
- Rename the 'unutemplate' folder to your packid, then open this folder.
- Open the packdefinition.json and fill it out (I suggest just changing packid and pack name)
- Now you can make skins!
Making skins:
- Figure out what vehicles you want to make skins for, and what pack it is from (for example, an UNU Rabbit from the UNU Civil Pack).
- In your <packid> folder, you will see a folder called jsondefs, this is where your skin .json files are. These are the files that 'code' your skins.
- There are also other folders in assets that correspond to UNU packs, like unuparts and unucivil. this is where your skin.png files will go.
- If you open the jsondefs, then skins folder, you will see folders for each UNU pack. These are further organized just as they are in the various packs.
- Find the skin jsons you want, and delete everything else (you can always get them later by redownloading this pack).
- Do the same with all the template textures in the various other folders mentioned in step 3
- Open the skin json file for the vehicle you want to make a skin for, you will see fields like "name" "subName" etc. The "name" is what you want the vehicle to be called in-game. The "subName" is the file name for your skin, like "_orange" or "_army". This determines the suffix for your itemname and the filename of your skin. For example, if we made an orange skin for the UNU Rabbit, since the vehicle's base name is "unucivil_vehicle_unu_rabbit_coupe", and our skin name is "_orange", the skin texture file will be named "unucivil_vehicle_unu_rabbit_coupe_orange.png". I highly reccomend using a subName that is unique, or it may conflict with other skin packs!
- The extraMaterials section defines crafting materials to make the skin (in addition to the base materials). I suggest making a skin of the paint can and defining your own paint.
- The partTones define what color the parts will be (specifically, the definition's subName). The first one is the wheels, the second is the seats, and the third is the licenseplate. Change them to "" to use the default.
- You can repeat this one definition section to have multiple skins, so you could have two definitions, one for "_orange" and one for "_army". I suggest opening an official pack to see how this is done since the dfinitions section is right at the top.
- Once you have defined all your skins, use the template skins to easily make the skin files for your pack! In general, the purple is paint, yellow is carpet, pink is headliner, green/orange is secondary colors, and blue is interior. But make sure to check what colors align with the vehicle in-game!
- Test it out (make sure you have the base pack or the vehicle won't load), and upload it! You just made a skin pack without stealing anyone's model! Make sure to mark whatever pack you used as a dependancy on Curse to make sure it gets downloaded!
Screenshots
Gallery
-
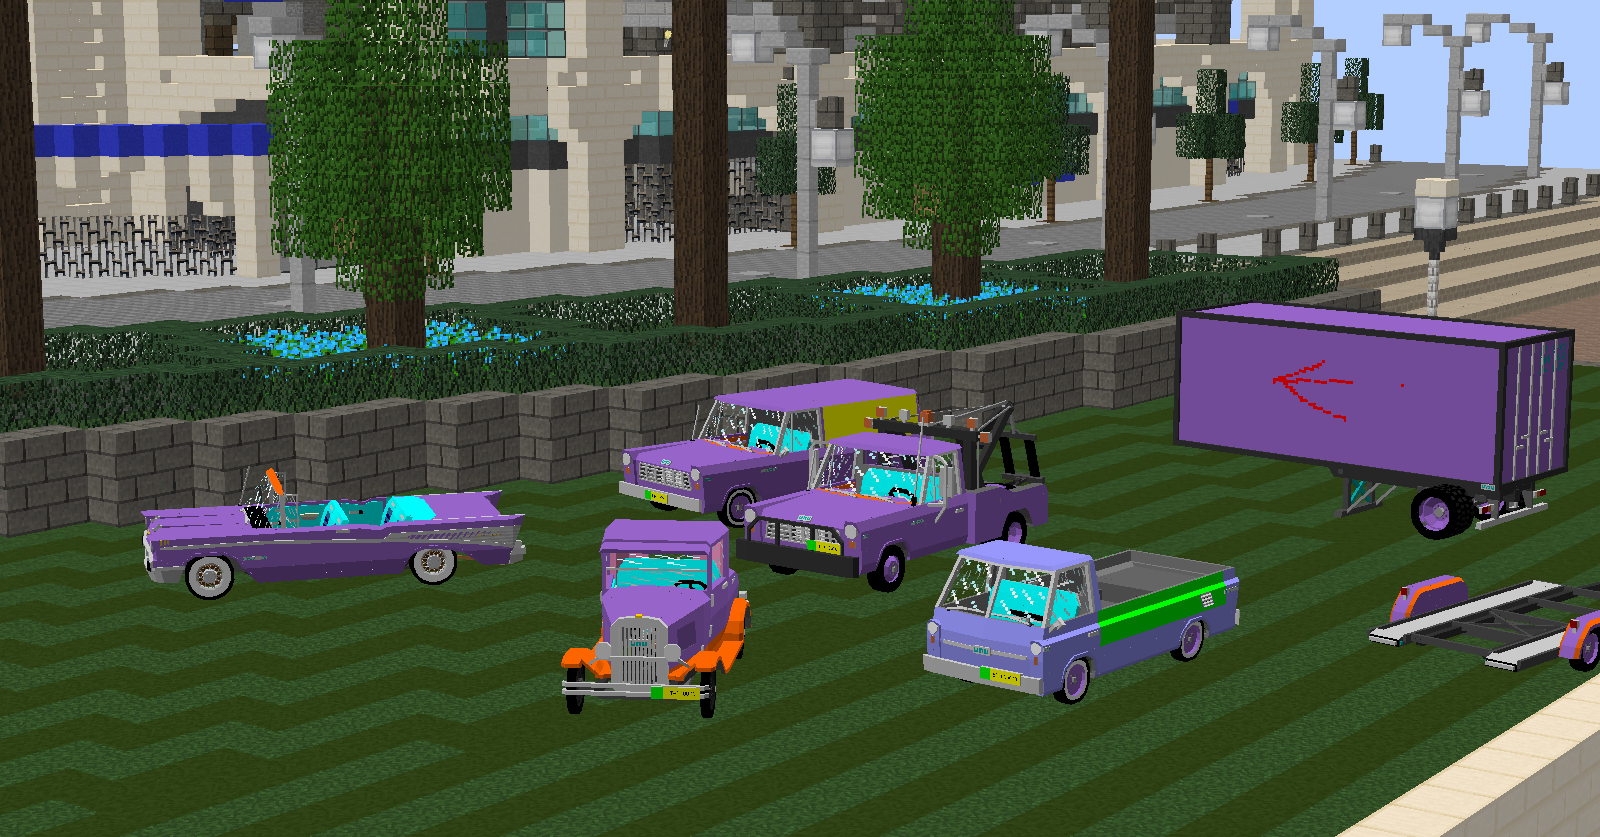 Template Skins This pack features template textures and skin jsons to easily make your own color combinations, all without ripping UNU models, so you can safely upload it as your own pack!
Versions
Files
Relations
Project Relations
More like this
Similar Mods
Suggestions use data such as tags, dependencies, dependents, descriptions, titles, and more to rank how much they overlap with this mod.
- UNU Parts Pack [MTS]
- UNU Civilian Vehicles [MTS/IV] [IR] (immersive cars trucks planes & trains)
- UNU Military Vehicles [MTS/IV] [IR] (jeep truck trains)
- UNU Parts Lite
- UNU: Unofficial Nether Update
- [IV/MTS/UNU] Bjorn's customs
- [MTS/IV] DKZ Industries
- stargate-futures-cars
- Trin Gramados Extension Pack
- Silver's Aftermarket & Customs Pack [IV/MTS]
- Avoris Parts [IV/MTS]
On ModDex
Community snapshot
By the numbers
Statistics
Want to reach Minecraft players?
We're looking for a server hosting partner to feature here and other parts of the site. Interested? Send us a message!
Get in touchGet it on
Available Platforms
On ModDex
Community snapshot
By the numbers
Statistics
Resources