Community listing page, reviews here may not be monitored by the author.
Custom Item Models


No reviews yet
Custom Item Models Mod powered by Custom Model Data Component
Community voices
Reviews
No reviews yet. Be the first to review this project!
Get it on
Available Platforms
Compatibility
Supported Environments
Runs entirely on the server. Also works in singleplayer.
About
Project Details
For authors
Embed Badge
If you're the author of this project, you can embed a live badge anywhere that supports HTML or Markdown. It updates automatically whenever ratings change.
Use HTML for any page that supports it, or Markdown for README files and Markdown-based descriptions.
Identifiers
Platform IDs
About
Description
Custom Item Models
Setup
This modification is only needed on the server side - clients without this mod will be able to join and use all provided functionality. It also works in singleplayer if installed on client.
Usage
To see compatible ResourcePack examples, navigate into tutorial directory.
Rename Name Tag on the Anvil into the string that you would usually put inside minecraft:custom_model_data={strings:[]} array.
 Diamond before applying Name Tag with the title
 ruby:
{
    count: 1,
    Slot: 0b,
    id: "minecraft:diamond"
}
Then, apply this Name Tag onto the item via Smithing Table.
 Diamond after applying Name Tag with the title
 ruby:
{
    count: 1,
    Slot: 0b,
    id: "minecraft:diamond",
    components: {
        "minecraft:custom_model_data": {
            strings: ["ruby"]
        }
    }
}
This mod also changes minecraft:equippable component for such items as armor pieces and elytras.
for example, Diamond Helmet before applying Name Tag with the title crown:
{
count: 1,
Slot: 0b,
id: "minecraft:diamond_helmet"
} and after applying Name Tag with the title
 crown:
{
    count: 1,
    Slot: 0b,
    id: "minecraft:diamond_helmet",
    components: {
        "minecraft:custom_model_data": {
            strings: ["crown"]
        },
        "minecraft:equippable": {
            equip_sound: "minecraft:item.armor.equip_diamond",
            slot: "head",
            asset_id: "cim:crown"
        }
    }
}
ATTENTION: Be aware that asset_id will always be under cim namespace, due to how vanilla code operates. You can see examples in the tutorial directory.
You don't have to use cim namespace for item models, only for armor rendering.

License
This mod is available under the MIT license. Feel free to learn from it and incorporate it in your own projects.
Custom Item Models
Setup
This modification is only needed on the server side - clients without this mod will be able to join and use all provided functionality. It also works in singleplayer if installed on client.
Usage
To see compatible ResourcePack examples, navigate into tutorial directory.
Rename Name Tag on the Anvil into the string that you would usually put inside minecraft:custom_model_data={strings:[]} array.
Diamond before applying Name Tag with the title ruby:
{
    count: 1,
    Slot: 0b,
    id: "minecraft:diamond"
}
Then, apply this Name Tag onto the item via Smithing Table.
Diamond after applying Name Tag with the title ruby:
{
    count: 1,
    Slot: 0b,
    id: "minecraft:diamond",
    components: {
        "minecraft:custom_model_data": {
            strings: ["ruby"]
        }
    }
}
This mod also changes minecraft:equippable component for such items as armor pieces and elytras.
for example, Diamond Helmet before applying Name Tag with the title crown:
{
    count: 1,
    Slot: 0b,
    id: "minecraft:diamond_helmet"
}
and after applying Name Tag with the title crown:
{
    count: 1,
    Slot: 0b,
    id: "minecraft:diamond_helmet",
    components: {
        "minecraft:custom_model_data": {
            strings: ["crown"]
        },
        "minecraft:equippable": {
            equip_sound: "minecraft:item.armor.equip_diamond",
            slot: "head",
            asset_id: "cim:crown"
        }
    }
}
ATTENTION: Be aware that asset_id will always be under cim namespace, due to how vanilla code operates. You can see examples in the tutorial directory.
You don't have to use cim namespace for item models, only for armor rendering.
License
This mod is available under the MIT license. Feel free to learn from it and incorporate it in your own projects.
Screenshots
Gallery
-
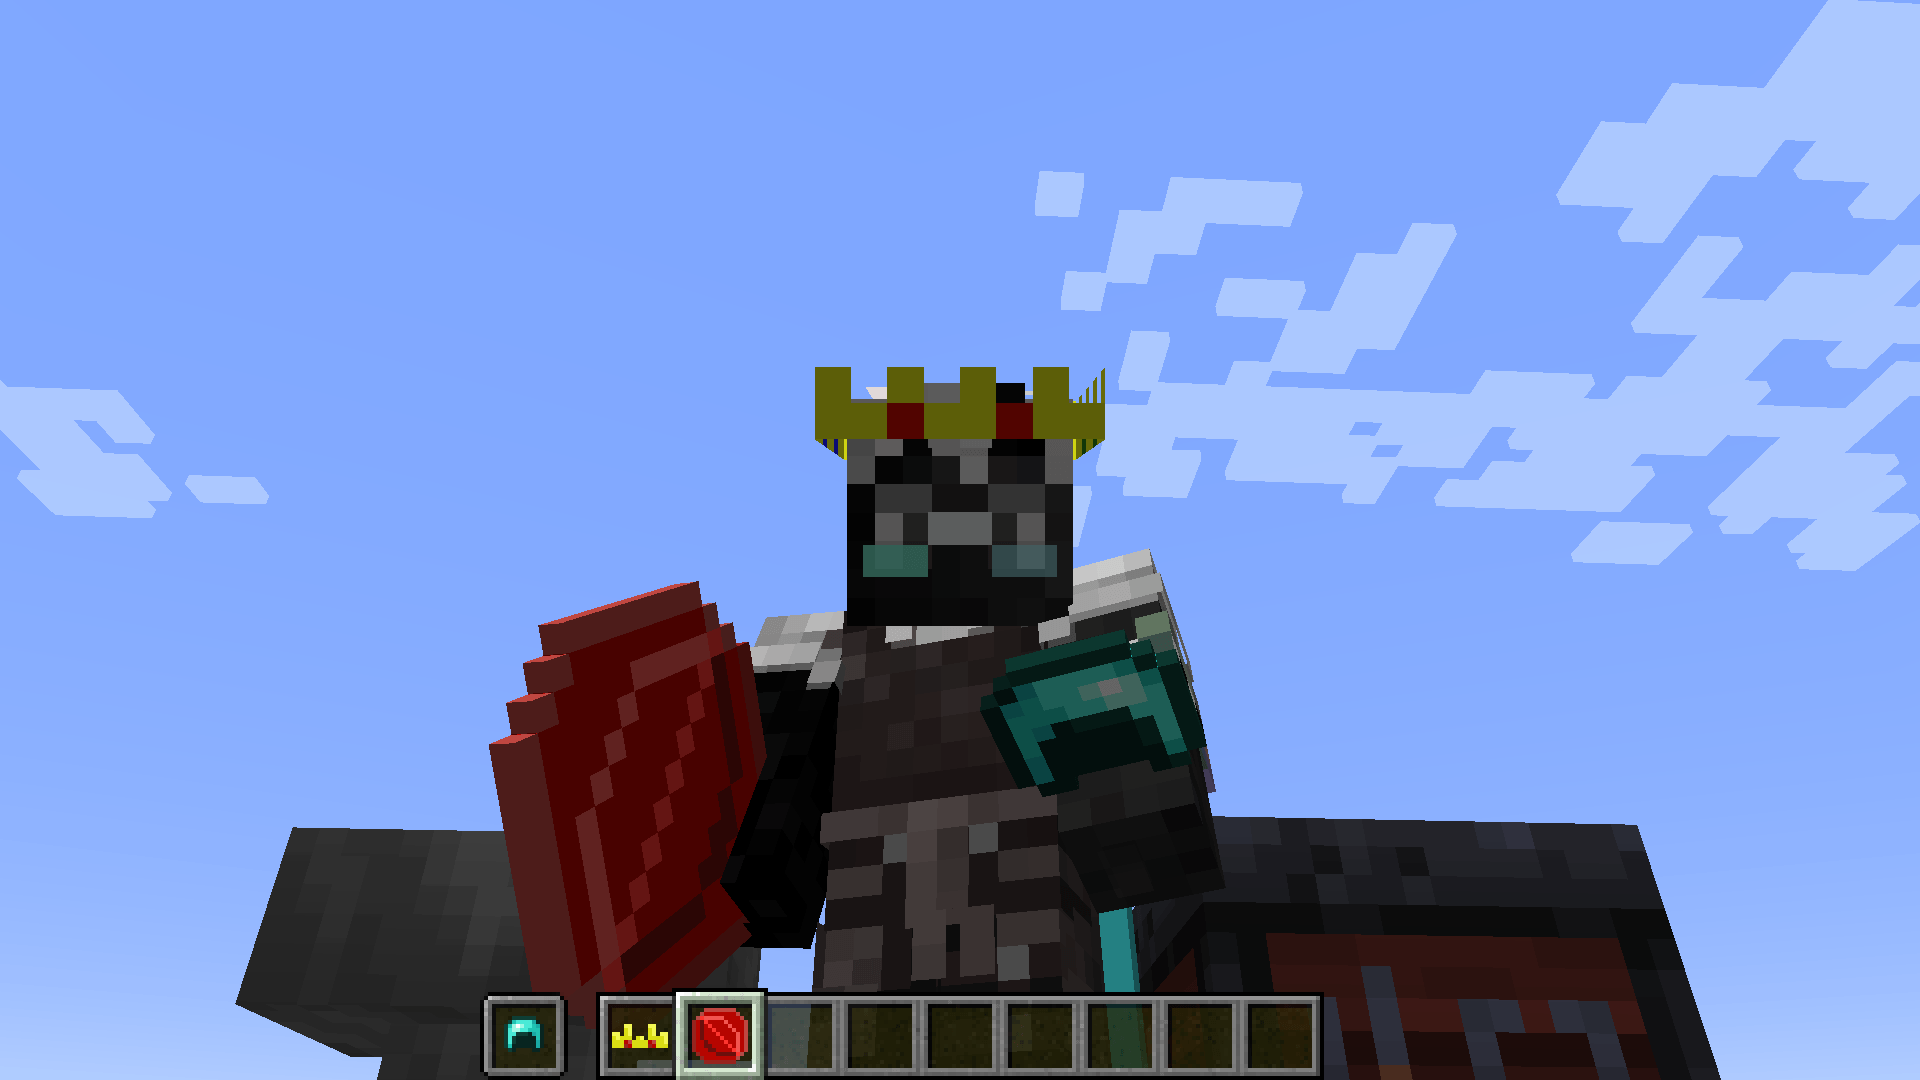 End result
 -
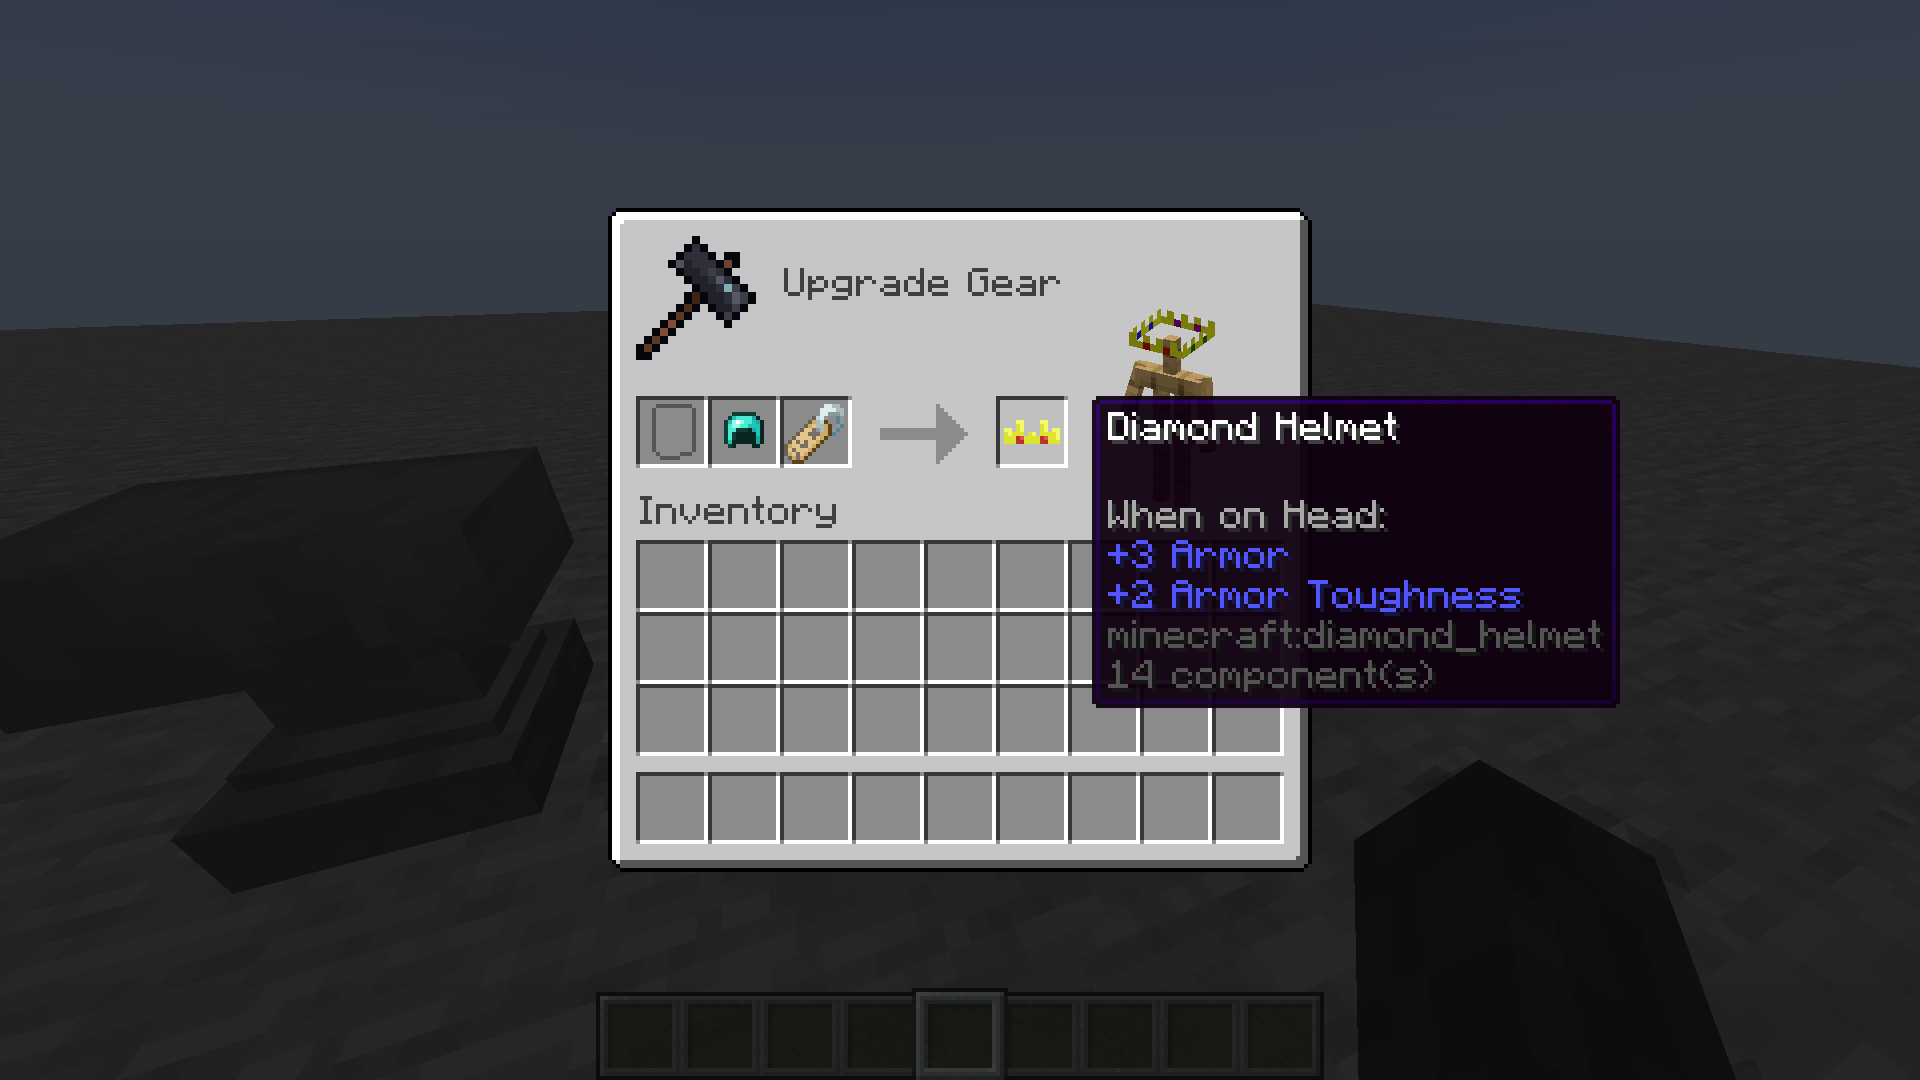 Also works for Armor
 -
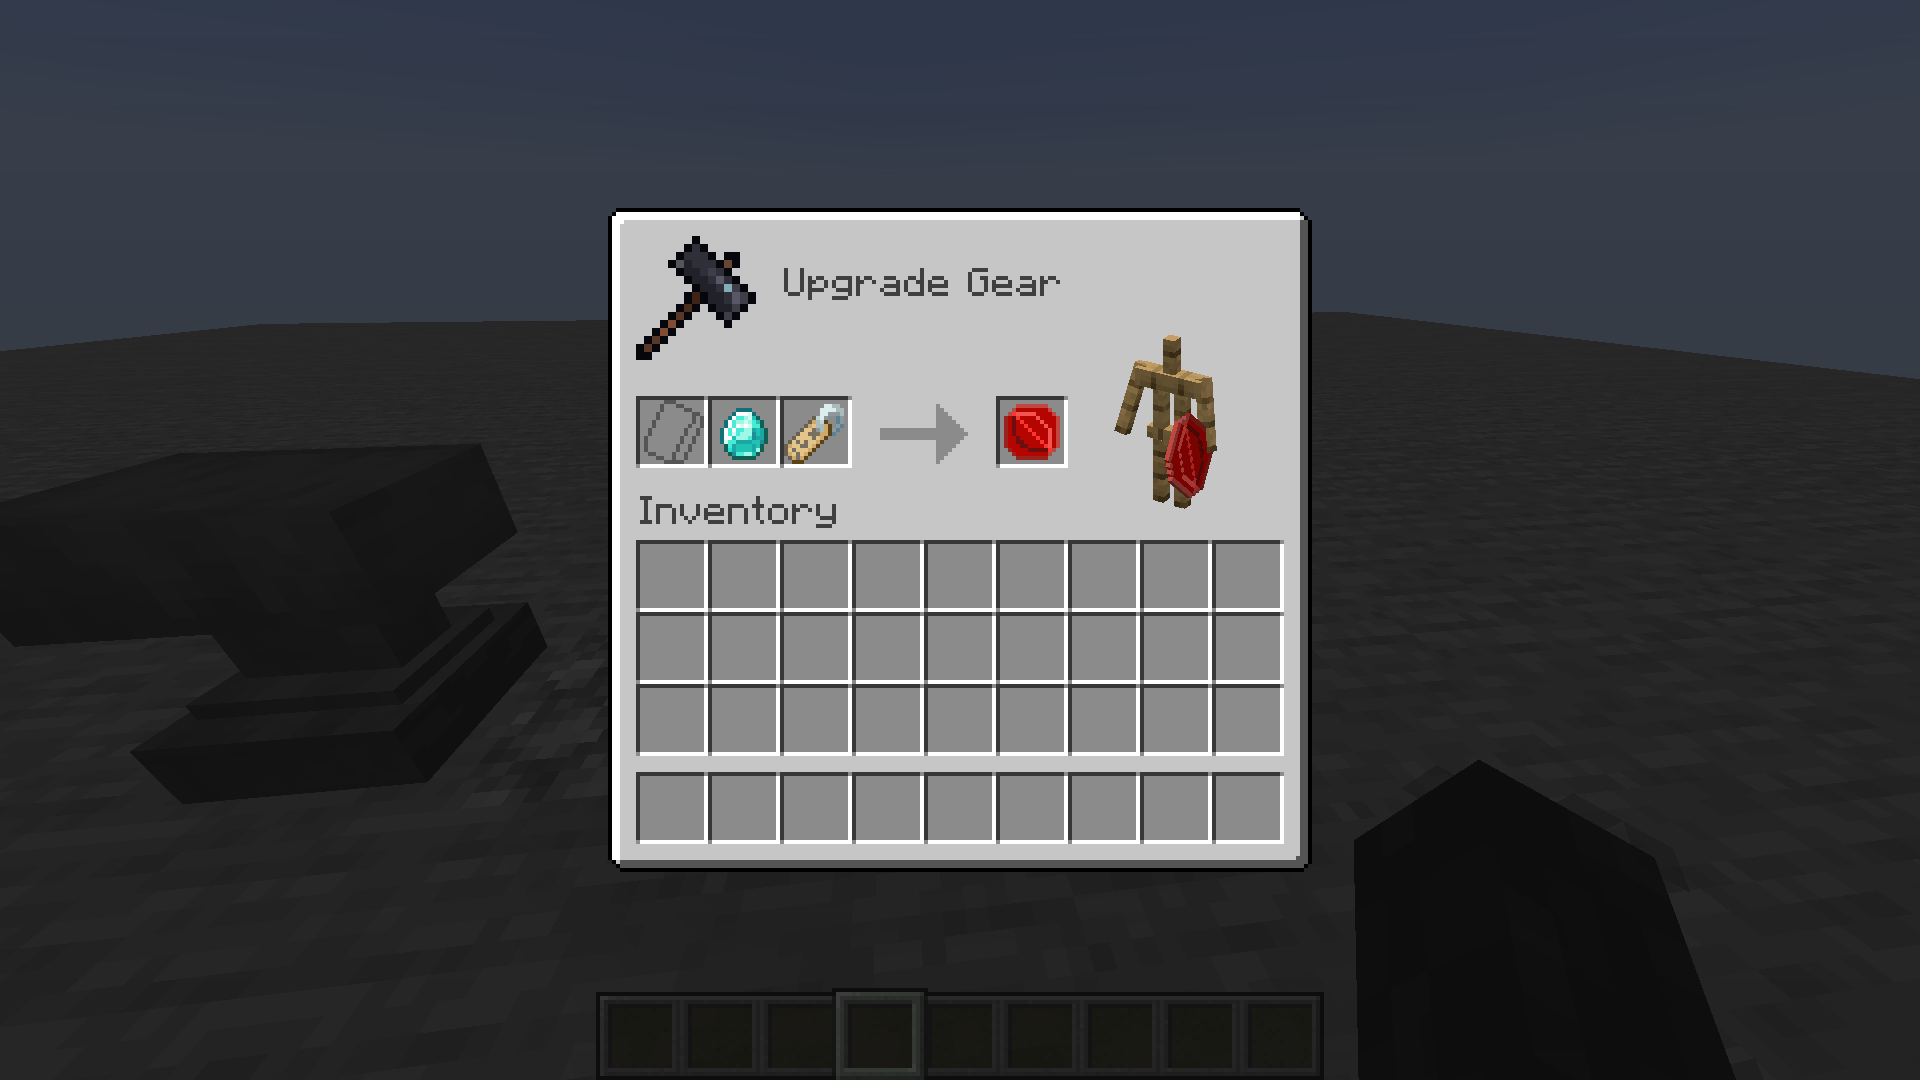 Applying Name Tag for Ruby
 -
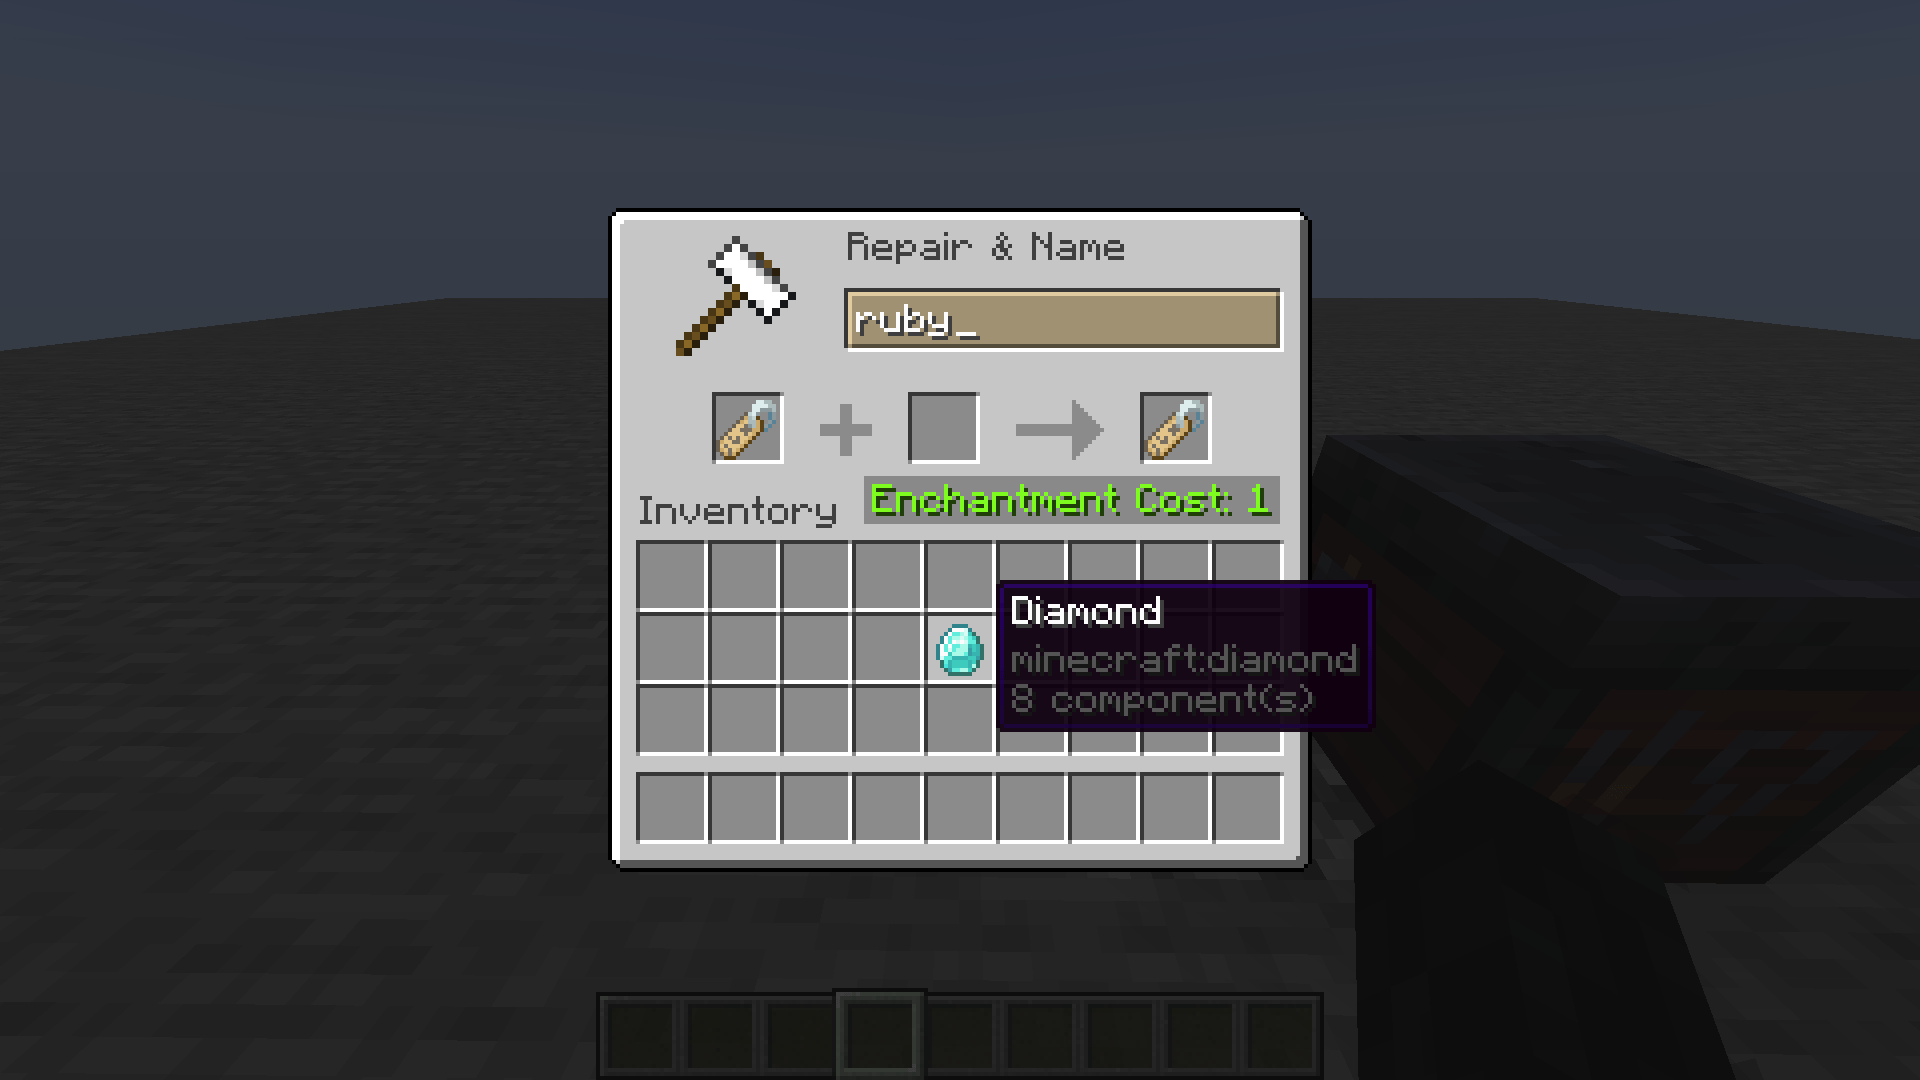 Renaming Name Tag for future usage
-
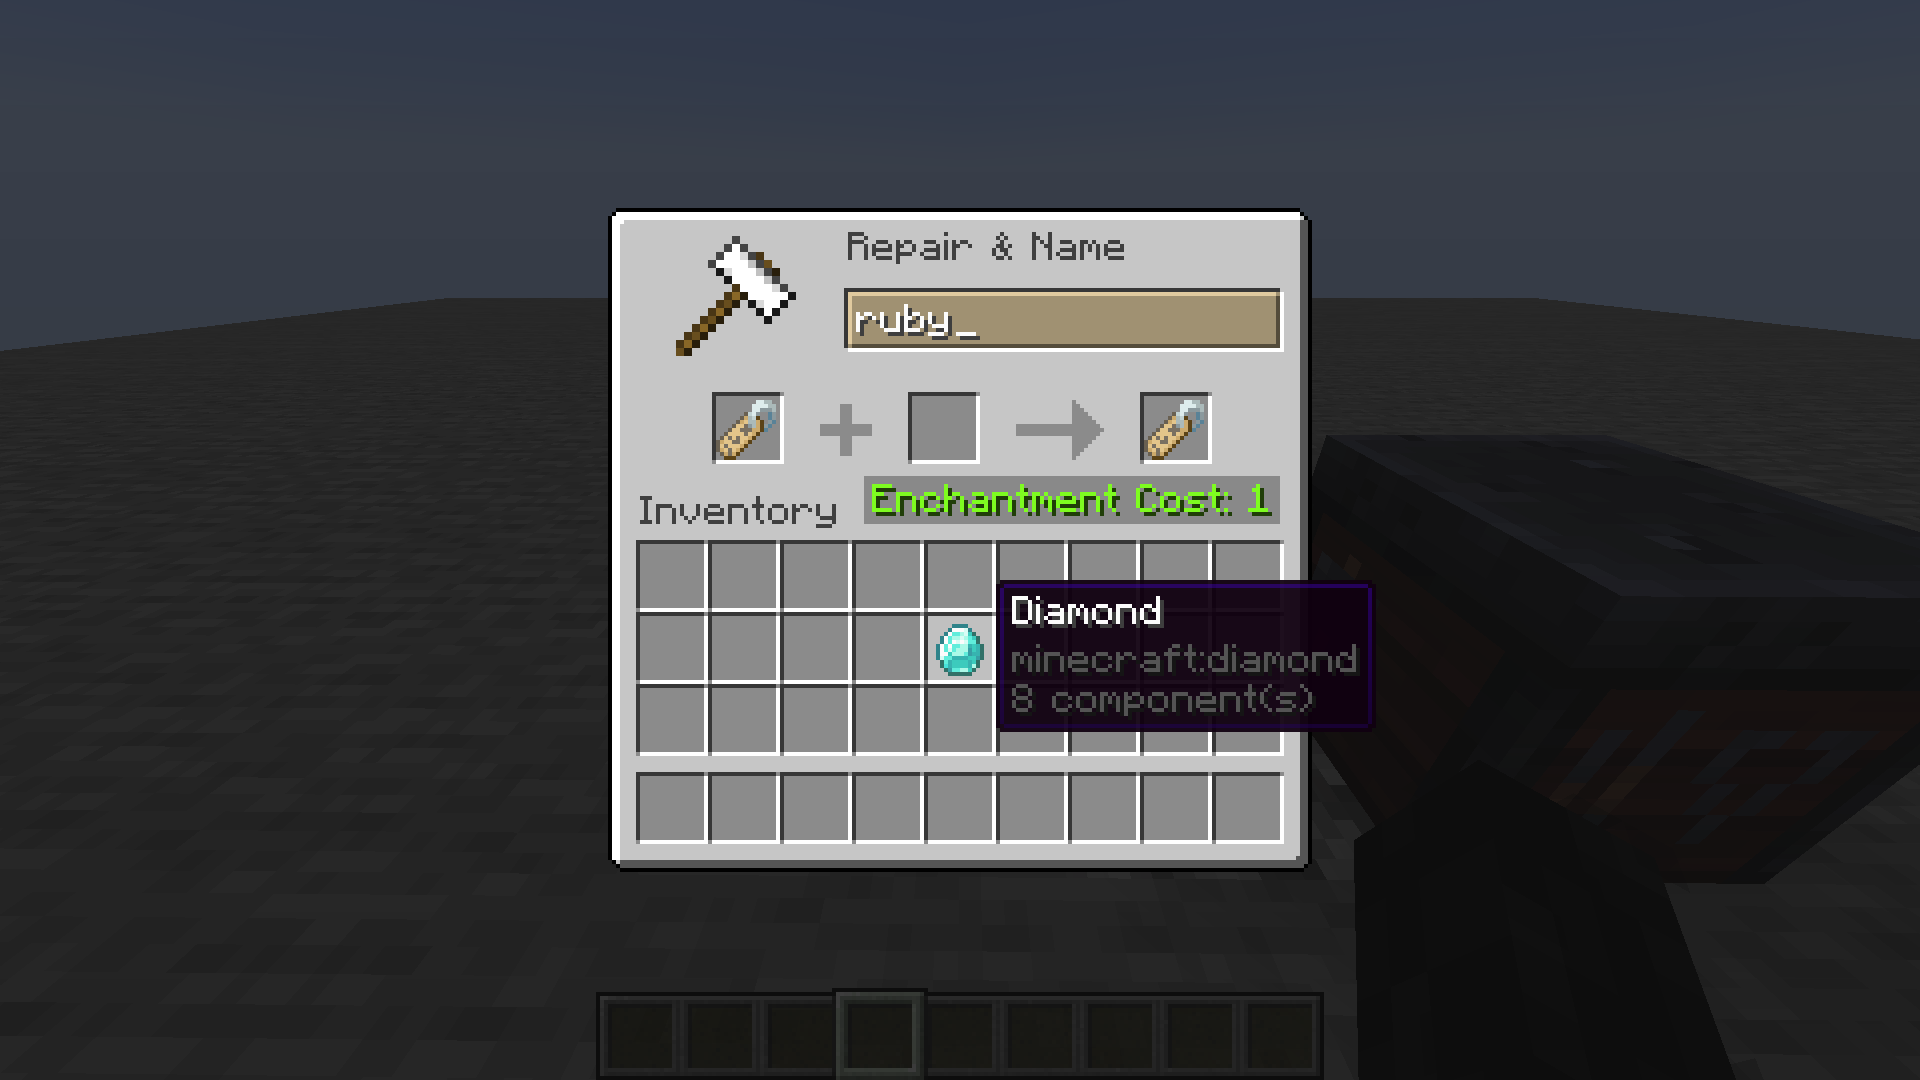 Renaming Name Tag for future usage
 -
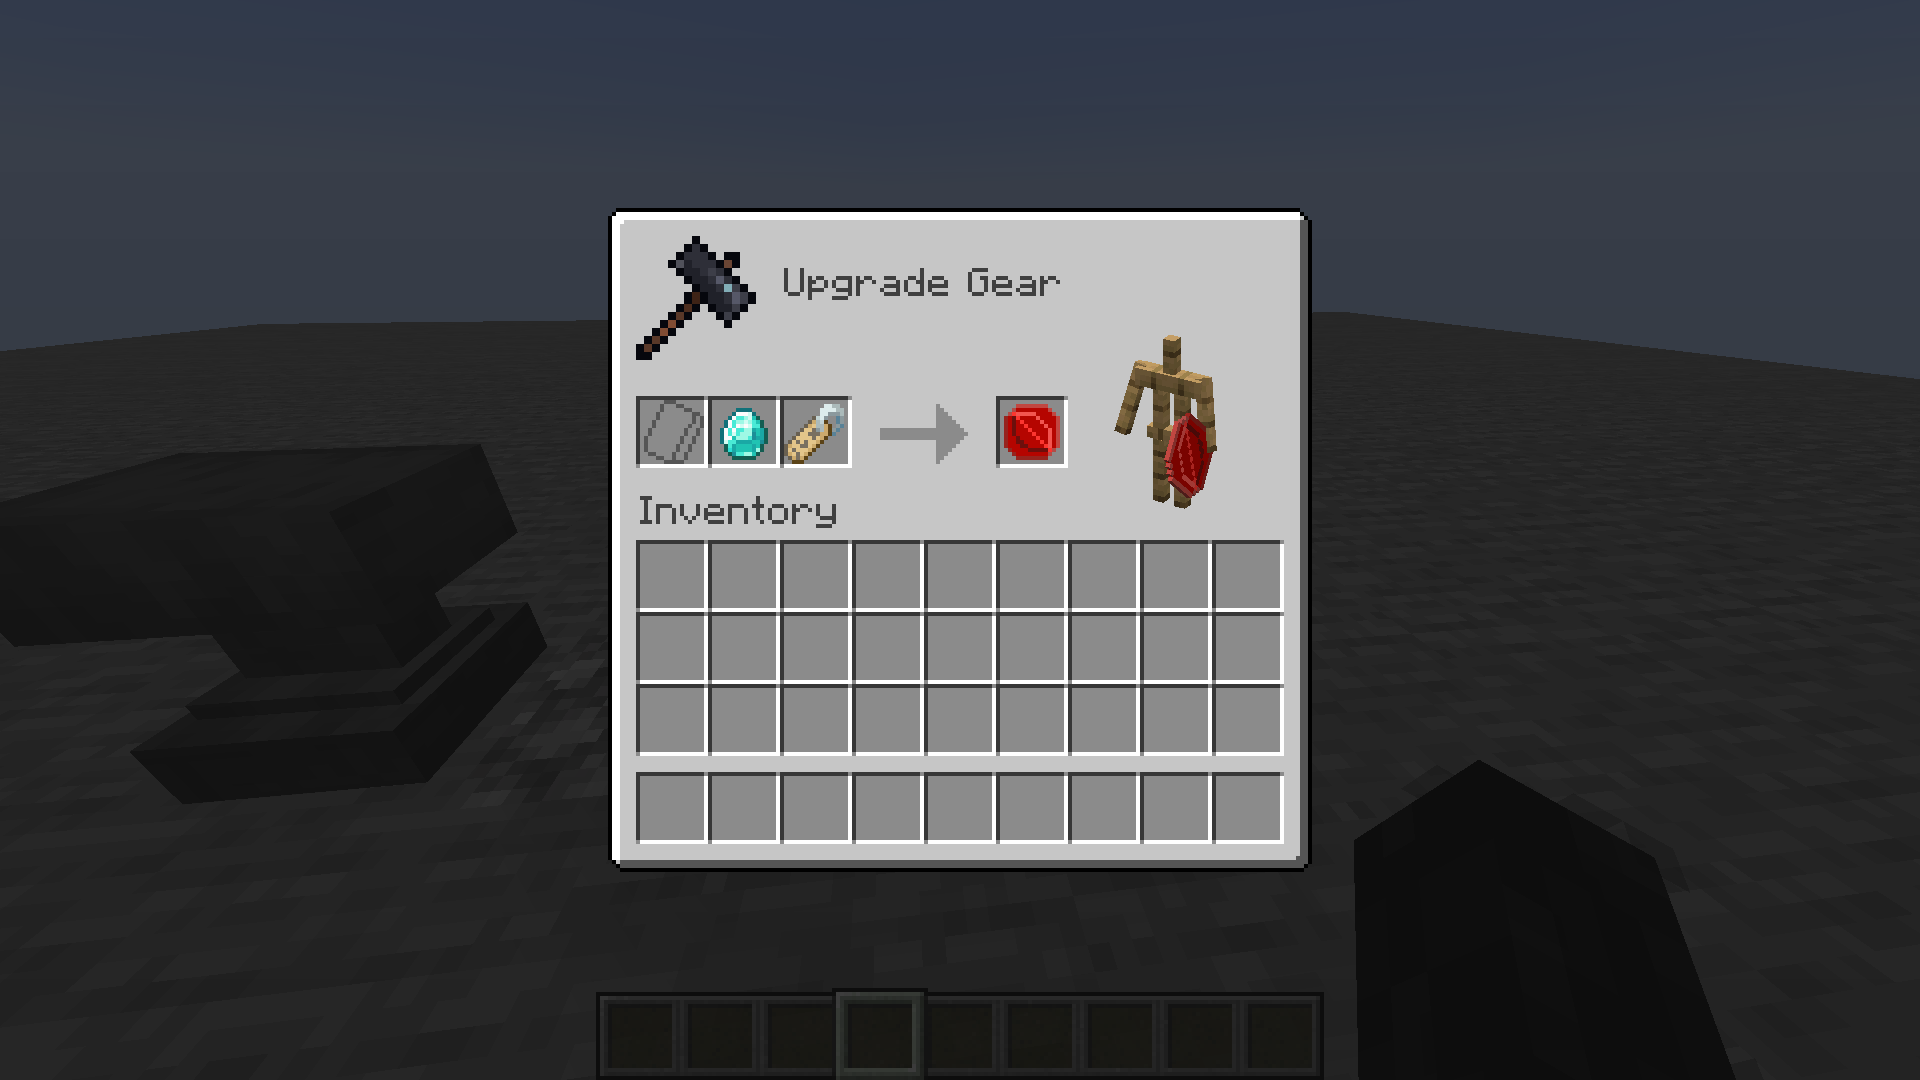 Applying Name Tag for Ruby
 -
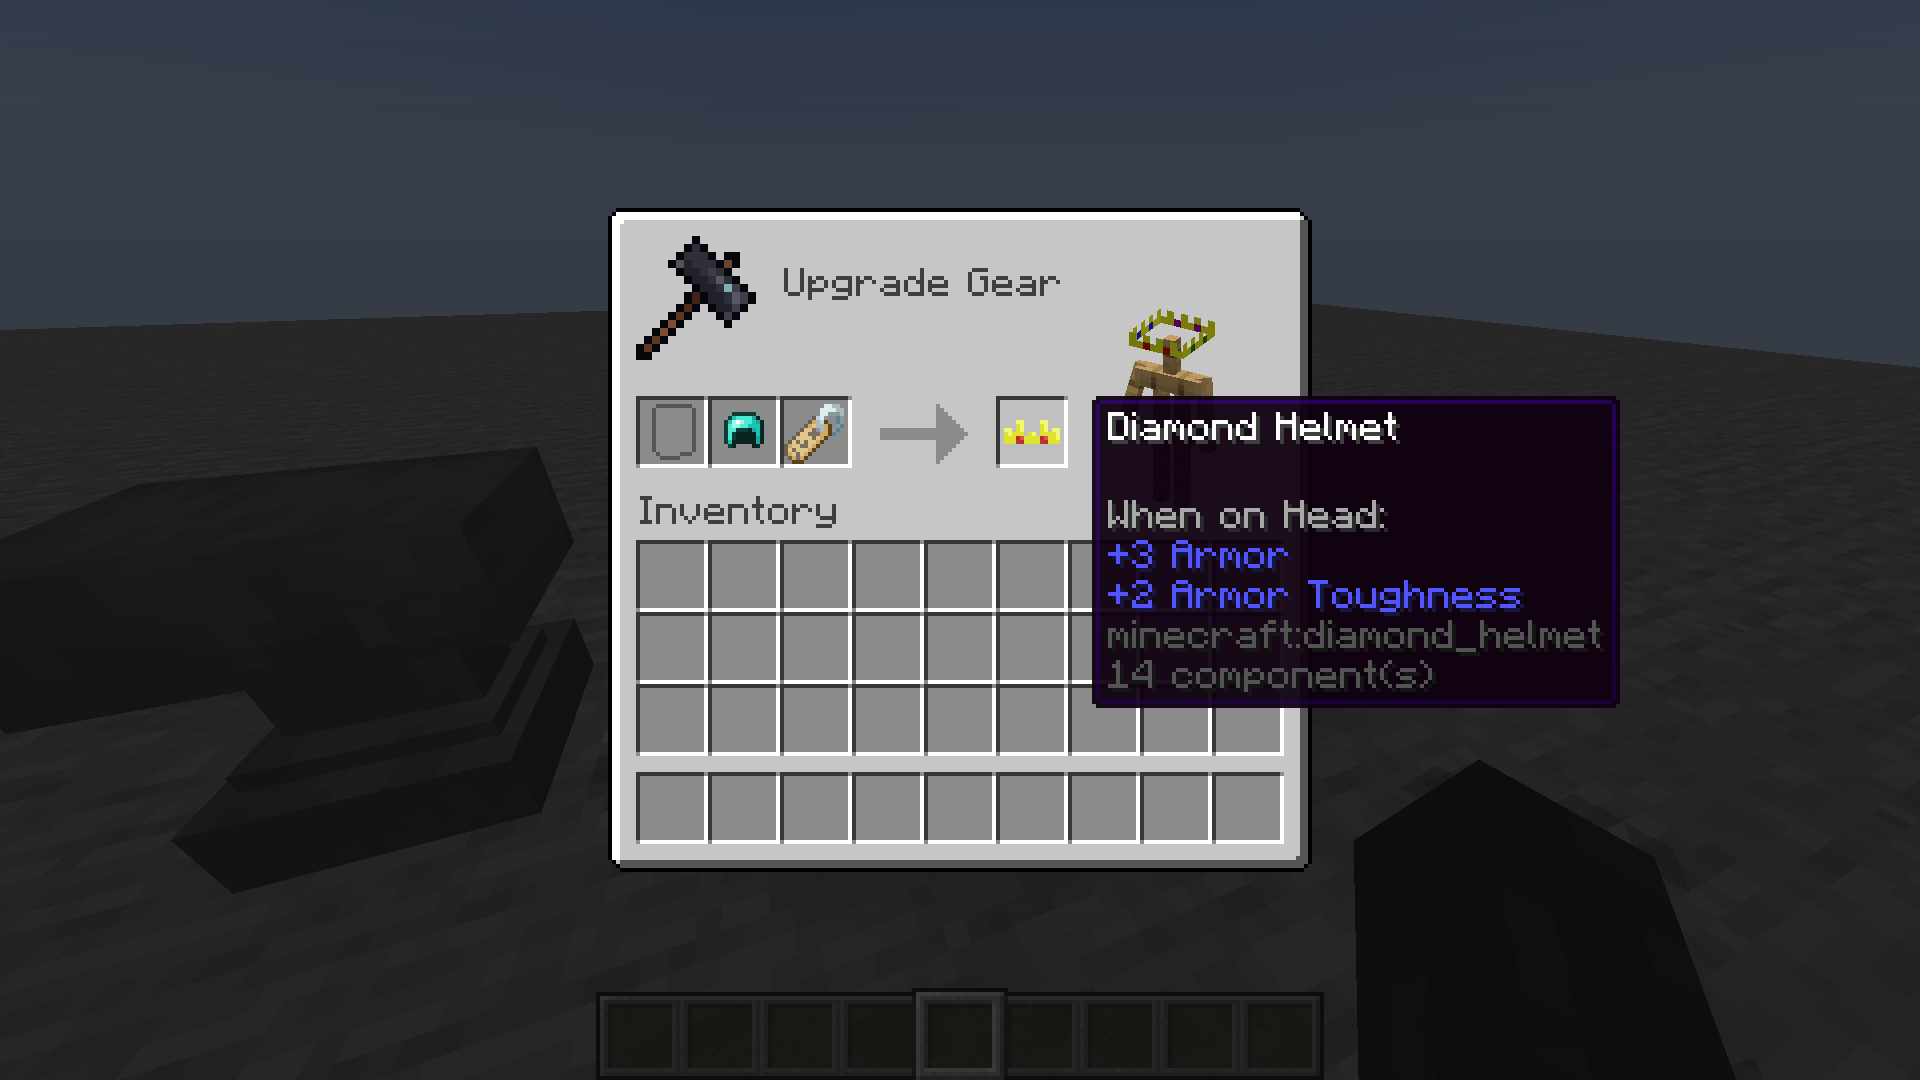 Also works for Armor
 -
 End result
Versions
Files
Relations
Project Relations
More like this
Similar Mods
Suggestions use data such as tags, dependencies, dependents, descriptions, titles, and more to rank how much they overlap with this mod.
On ModDex
Community snapshot
By the numbers
Statistics
Want to reach Minecraft players?
We're looking for a server hosting partner to feature here and other parts of the site. Interested? Send us a message!
Get in touchGet it on
Available Platforms
On ModDex
Community snapshot
By the numbers