Community listing page, reviews here may not be monitored by the author.
Camera Obscura - Serverside Rendering


No reviews yet
Take Photos of your world or server as Map Item, no client-side mods required!

Community voices
Reviews
No reviews yet. Be the first to review this project!
Get it on
Available Platforms
Compatibility
Supported Environments
Runs entirely on the server. Also works in singleplayer.
About
Project Details
For authors
Embed Badge
If you're the author of this project, you can embed a live badge anywhere that supports HTML or Markdown. It updates automatically whenever ratings change.
Use HTML for any page that supports it, or Markdown for README files and Markdown-based descriptions.
Identifiers
Platform IDs
About
Description
Camera Obscura

Take photos of your world / server!
When used on a server: no client side mods required!
Everything is rendered on the server using raycasting.
Requires the Polymer library!

Item:
The mod adds a Camera Item, for clients it looks and functions like a normal spyglass but has a custom name and consumes a map item or other, as specified in the configs.
There is no recipe for the item (yet)
Configs
The config file will be created on first launch and is located in
configs/camera-obscura.json
Example config with default values:
{
  "renderDistance": 128,
  "showSystemMessages": false,
  "renderEntities": false,
  "renderEntitiesAmount": 20,
  "fullbright": false,
  "fov": 70,
  "biomeBlend": 1,
  "cameraItem": "minecraft:spyglass",
  "cameraConsumesItem": true,
  "cameraConsumeItem": "minecraft:map",
  "commandPermissionLevel": 2
}
Explanation:
renderDistance: Render distance in blocksshowSystemMessages: Flag wether system messages should be shown when a photo is being taken when run as command, default isfalserenderEntities: Flag for experimental entity rendering, default isfalserenderEntitiesAmount: Amount of entities to render when entity rendering is enabled, default is20fullbright: Flag wether light levels should be ignored, rendering everything with the highest light level. Default isfalsefov: Field of View, functions the same way the vanilla client FOV works, minimum value is 30, maximum 110 (Quake Pro). Default is70biomeBlend: Biome blend valuecameraItem: Vanilla Item to use as camera item model/texture, default isminecraft:spyglasscameraConsumesItem: Flag if an item should be consumed, default value istruecameraConsumeItem: Item to consume when the camera item is used. No items will be consumed when ran as command, default isminecraft:mapcommandPermissionLevel: Vanilla Permission level, default value is2
Commands:
/camera-obscura
Takes a picture of the player running the command and gives the resulting map item to that player
/camera-obscura <[Entity|Player]> <scale>
Takes a picture as the source entity and gives the player the resulting maps, a scale of up to 3 (3x3 maps) can be specified optionally.
/camera-obscura save
Takes a picture of the player running the command and saves it as png in
renders/<imagename>.png,
where imagename is the current date in the format
yyyy-MM-dd HH:mm:ss.SSS
/camera-obscura save <Entity> <scale>
Takes a picture as the source entity and gives the player the resulting maps, a scale of up to 10 (1280px * 1280px) can be specified optionally.
Default image size is 128px * 128px
/camera-obscura clear-cache
Clears the cache (textures, resourcepack models and blockstate definitions, cached render models)
Permissions:
Default Vanilla permission level is 4, this can be configured with commandPermissionLevel For luckperms, etc. - those should be self-explanatory:
camera-obscura.command
camera-obscura.command.scale
camera-obscura.command.entity
camera-obscura.command.entity.scale
camera-obscura.command.save
camera-obscura.command.save.scale
camera-obscura.command.save.entity
camera-obscura.command.save.entity.scale
camera-obscura.clear-cache
Known Issues:
All of those will be fixed sooner or later
- Entity rendering is slow and doesn't support all entities
- Liquids are "blocky"
- Hard lighting
- End Gateway and end portal blocks are pure black (they use the black concrete texture temporarily)
- Models that are larger than a single block can get cut-off during rendering
- Rendering breaks with coordinates in the millions
How it works:
The game assets are downloaded from mojangs servers and read to render the world using raytracing.
When the render is done, a Map item with the image is created or a png is saved to the renders folder.
Test Sever
Join the test server with a 1.20.5-1.21.1+ client on
mc.tomalbrc.de:25565
to test this mod and my other mods + upcoming, unreleased mods and features!
Camera Obscura
Camera Obscura is a server‑side software rasterizer that renders the world as seen by any entity (player, mob, etc.) directly on the server, producing Photos or Videos as Minecraft maps. It has deep integrations for custom items (Nexo, ItemsAdder) and a custom preset system.

Features
- Take photos: Generate a map item showing what the target entity sees.
- Record videos: Capture your world on video and play it back on item frames.
- Fully configurable: Resolution, color mode, dithering, render distance, and more.
- Custom item support: Create cameras/camcorders with any appearance via Nexo or ItemsAdder.
- Asynchronous rendering: Never blocks the main server thread.
- No client mods required: Everything is server‑side; maps/recordings work on vanilla clients.
Installation
Fabric Server
- Install Fabric API and Polymer (for virtual items).
- Place
camera-obscura-fabric.jarinto yourmods/folder. - The configuration file will be created on start.
Configuration
The configuration file is config/cameraobscura/config.json.
{
  "renderDistance": 32,
  "showSystemMessages": false,
  "renderEntities": true,
  "fullbright": false,
  "fov": 70,
  "biomeBlend": 1,
  "ssaa": 2,
  "maxChunkRebuildsPerTick": 5,
  "debug": false,
  "cameraConsumesItem": true,
  "cameraConsumeItem": "map",
  "commandPermissionLevel": 2
}
| Option | Description |
|---|---|
renderDistance |
View distance in blocks (higher = longer render time). |
showSystemMessages |
Show “Taking photo…” / “Done!” messages in chat. |
renderEntities |
Whether to render entities (players, mobs, item frames) in the picture. |
fullbright |
Ignore lighting (everything appears at full brightness). |
fov |
Field of view in degrees (default is 70). |
biomeBlend |
Radius for blending block colors (biome tint). 0 = no blending. |
ssaa |
Supersampling anti‑aliasing factor (1 = off, 2 = 2x supersampling, 3 = 3x). |
maxChunkRebuildsPerTick |
Maximum chunks rebuilt per frame per video recording and live-map (to limit CPU spikes). |
debug |
Print frame timings and show FPS overlay on the output image. |
cameraConsumesItem |
Whether taking a photo consumes an item (e.g. a map). |
cameraConsumeItem |
Required item material (e.g. map, paper). |
commandPermissionLevel |
Base permission level for commands. |
Commands & Permissions
Base permission cameraobscura.command.
All commands use the root /camera-obscura
1. Take a map from your perspective
/camera-obscura [scale]
scale: multiply the map resolution (1 = 128×128, 2 = 256×256, up to 3).- Gives you a filled map showing what you see.
2. Take a map of another entities perspective
/camera-obscura <entity> <player> [scale]
<entity>: any living entity (player, mob, etc.)<player>: who receives the map item.
3. Save as PNG image
/camera-obscura save [entity] [scale]
- Saves the rendered image as a
.pnginconfig/cameraobscura/renders/.
4. Reload configuration
/camera-obscura reload
Reloads the config file.
5. Clear resource/model cache
/camera-obscura clear-cache
6. Give a camera item
/camera-obscura give <preset> [player]
<preset>: The name of a preset defined inpresets.json(e.g.camera,camcorder,instant,polaroid,pro_camera,handycam,cctv).[player]: Optional player name; if omitted, gives the item to the command sender.
Examples:
/camera-obscura give camera-> gives yourself the default camera./camera-obscura give camcorder Pinnit-> gives the playerPinnita camcorder./camera-obscura give my-preset-> gives yourself an item from a preset.
📷 Using the Camera Item
Basic Camera
- Hold the camera in your main hand.
- Right‑click -> after a countdown, the photo map item appears in your inventory (or drops on the ground if full).
- The map shows the world from your viewpoint at that moment.
Camcorder
- Same controls, but starts recording instead of taking a single photo.
- The action-bar text indicates recording.
- Release to stop recording, the video will be saved as a map item that can be played back on item-frames.
- While recording, particles appear around the camera (frame effect).
- Videos are stored as APNG in
config/cameraobscura/camera_videos/<id>.apng
Components
The mod uses data components to store camera settings on the item stack.
This allows you to create cameras with different resolutions, color modes, and video parameters using standard commands, recipes, or loot tables.
Available Components
| Component ID | Type | Description |
|---|---|---|
camera-obscura:color |
string (ColorMode) |
"COLOR", "MONOCHROME", "GRAYSCALE", "SEPIA" |
camera-obscura:resolution |
{width:int, height:int} |
Resolution in pixels (e.g. {width:256, height:256}) |
camera-obscura:dither |
string (DitherMode) |
"NONE", "BAYER_2X2", "FLOYD_STEINBERG", etc. (see full list below) |
camera-obscura:video |
{frame_rate:int, max_frames:int, loop_playback:bool} |
Video recording parameters |
camera-obscura:map |
unit |
Marks the item as a live map (internal) |
camera-obscura:camera_entity |
entity_reference |
Stores the entity that took the photo (internal) |
camera-obscura:data |
{id:uuid, video_params:...} |
Internal video data |
DitherMode values:
NONE, BAYER_2X2, BAYER_4X4, BAYER_8X8, FLOYD_STEINBERG, ATKINSON, JARVIS_JUDICE_NINKE, STUCKI, SIERRA, BURKES
Using Components in Commands
/give
/give @p camera-obscura:camera[camera-obscura:color="SEPIA",camera-obscura:resolution={width:512,height:512},camera-obscura:dither="FLOYD_STEINBERG"]
/item modify
Create a data pack with an item modifier:
{
  "function": "set_components",
  "components": {
    "camera-obscura:color": "GRAYSCALE",
    "camera-obscura:resolution": { "width": 192, "height": 192 },
    "camera-obscura:dither": "BAYER_8X8"
  }
}
Then run: /item modify entity @s weapon.mainhand my_pack:camera_settings
Using Components in Recipes
In a crafting recipes:
{
  "type": "minecraft:crafting_shaped",
  "pattern": ["###", "#P#", "###"],
  "key": {
    "#": "minecraft:iron_ingot",
    "P": "minecraft:ender_pearl"
  },
  "result": {
    "id": "camera-obscura:camera",
    "components": {
      "camera-obscura:color": "SEPIA",
      "camera-obscura:resolution": { "width": 128, "height": 128 },
      "camera-obscura:dither": "NONE"
    }
  }
}
For a camcorder (video mode), include video:
"components": {
  "camera-obscura:color": "COLOR",
  "camera-obscura:resolution": { "width": 256, "height": 256 },
  "camera-obscura:video": { "frame_rate": 15, "max_frames": 300 }
}
Giving a Camcorder with Default Video Settings
The basic camcorder item (without components) uses global config defaults. To explicitly set video parameters:
/give @s camera-obscura:camcorder[camera-obscura:video={frame_rate:10,max_frames:200,loop_playback:true}]
Built-in Items
On Fabric, Camera Obscura adds a few built‑in camera and camcorder items with pre‑configured settings (color mode, resolution, video parameters).
Camera Items (Photo Mode)
| Item ID | color Mode | Resolution | Dithering |
|---|---|---|---|
camera-obscura:camera |
COLOR |
128×128 | NONE |
camera-obscura:grayscale_camera |
GRAYSCALE |
128×128 | NONE |
camera-obscura:primitive_camera |
MONOCHROME |
128×128 | NONE |
camera-obscura:retro_camera |
SEPIA |
128×128 | NONE |
Camcorder Items (Video Mode)
Record videos with pre‑set framerate and max frame count.
| Item ID | color Mode | Resolution | Dithering | Video (FPS / Max Frames) |
|---|---|---|---|---|
camera-obscura:camcorder |
COLOR |
128×128 | NONE |
10 FPS / 400 frames |
camera-obscura:grayscale_camcorder |
GRAYSCALE |
128×128 | NONE |
20 FPS / 400 frames |
camera-obscura:primitive_camcorder |
MONOCHROME |
128×128 | NONE |
20 FPS / 400 frames |
camera-obscura:retro_camcorder |
SEPIA |
128×128 | NONE |
20 FPS / 400 frames |
Usage example:
/give @s camera-obscura:grayscale_camera
Video Playback
To play back a video maps:
- Place the map in an item frame.
- Right‑click the item frame and the video will start playing on the map.
- Right‑click again to stop playback.
Presets
You can add your own presets, pre‑configured camera items with custom materials, display names, and camera settings (resolution, color mode, dither mode, video parameters).
Presets are stored in presets.json and can be given to players using the /camera-obscura give <preset> <player> command.
Preset Configuration Format
The presets.json file contains a JSON object where each key is a preset name and the value is an object with the following fields:
| Field | Description |
|---|---|
material |
Item ID (e.g. "paper", "clock") |
camera |
Camera‑specific options (see below) |
components |
Optional vanilla data components to apply to the item stack (1.20.5+) |
Camera Options
All fields are optional
| Field | Type | Description |
|---|---|---|
resolution |
{ width, height } |
Output resolution in pixels (e.g. { "width": 256, "height": 256 }) |
color_mode |
string | "COLOR", "MONOCHROME", "GRAYSCALE", "SEPIA" |
dither_mode |
string | "NONE", "BAYER_2X2", "FLOYD_STEINBERG", etc. |
video_params |
{ frame_rate, max_frames } |
Video recording parameters |
Default Presets
The mod ships with several ready‑to‑use presets. You can modify or delete them as you like.
{
  "camera": {
    "material": "paper",
    "camera": {
      "resolution": { "width": 128, "height": 128 },
      "color_mode": "COLOR",
      "dither_mode": "NONE",
      "video": { "frame_rate": 0, "max_frames": 1 }
    },
    "components": {
      "minecraft:item_name": { "text": "Camera", "color": "gold" },
      "minecraft:max_stack_size": 1
    }
  },
  "camcorder": {
    "material": "paper",
    "camera": {
      "resolution": { "width": 128, "height": 128 },
      "color_mode": "COLOR",
      "dither_mode": "NONE",
      "video": { "frame_rate": 20, "max_frames": 200 }
    }
  },
  "instant": {
    "material": "paper",
    "camera": {
      "resolution": { "width": 256, "height": 256 },
      "color_mode": "SEPIA",
      "dither_mode": "BAYER_4X4"
    },
    "components": {
      "minecraft:item_name": { "text": "Instant Camera", "italic": false }
    }
  },
  "polaroid": {
    "material": "paper",
    "camera": {
      "resolution": { "width": 512, "height": 512 },
      "color_mode": "GRAYSCALE",
      "dither_mode": "FLOYD_STEINBERG"
    },
    "components": {
      "minecraft:item_name": { "text": "Polaroid", "color": "white" },
      "minecraft:custom_model_data": 1
    }
  },
  "pro_camera": {
    "material": "ender_eye",
    "camera": {
      "resolution": { "width": 128, "height": 128 },
      "color_mode": "COLOR",
      "dither_mode": "NONE",
      "video": { "frame_rate": 30, "max_frames": 600 }
    },
    "components": {
      "minecraft:item_name": { "text": "Pro Camera", "color": "light_purple", "bold": true },
      "minecraft:max_stack_size": 1,
      "minecraft:custom_model_data": 2
    }
  },
  "handycam": {
    "material": "clock",
    "camera": {
      "resolution": { "width": 256, "height": 256 },
      "color_mode": "COLOR",
      "dither_mode": "BAYER_2X2",
      "video": { "frame_rate": 15, "max_frames": 450 }
    },
    "components": {
      "minecraft:item_name": { "text": "Handycam", "color": "aqua" },
      "minecraft:max_stack_size": 1
    }
  },
  "cctv": {
    "material": "observer",
    "camera": {
      "resolution": { "width": 192, "height": 192 },
      "color_mode": "MONOCHROME",
      "dither_mode": "SIERRA",
      "video": { "frame_rate": 5, "max_frames": 30000 }
    },
    "components": {
      "minecraft:item_name": { "text": "CCTV Camera", "color": "dark_gray" },
      "minecraft:max_stack_size": 1
    }
  }
}
Using Presets in Commands
/camera-obscura give camera
/camera-obscura give camcorder
/camera-obscura give instant
/camera-obscura give handycam Notch
Tab completion suggests available preset names.
Reloading Presets
After editing presets.json while the server is running, run:
/camera-obscura reload
This reloads both the main configuration and all presets without restarting the server.
How It Works (Technical Overview)
Camera Obscura runs completely on the server and uses a software rasterizer to draw the scene pixel by pixel.
- The renderer requests chunks and entities around the target.
- Block models are converted into triangles and stored in a cache (per chunk).
- Lighting, ambient occlusion, and fog are computed from the actual world state.
- Rendering happens asynchronously on a separate thread pool, no lag for the main game.
- After rendering, the image is converted to (a) Minecraft map(s) (or saved as PNG).
- Video recording captures frames at the configured framerate.
Performance considerations
- Higher resolution & SSAA increase CPU usage drastically.
- Render distances above 128 may cause issues if chunks are not loaded.
- Video recording is CPU‑intensive. For high‑quality recordings, consider lowering the framerate!
Troubleshooting
| Problem | Check |
|---|---|
| Photo doesn't appear in inventory | Check that cameraConsumesItem is false or you have the required item (e.g. a map). |
| “Missing required item” message | You need the configured cameraConsumeItem material in your inventory. |
| Very long render times (> 5 seconds) | Reduce renderDistance, ssaa, or resolution. Enable debug to see per‑frame timings. |
| Server crashes with OOM error | Increase server memory (-Xmx2G or more). Lower renderDistance and ssaa. |
| Custom Nexo/ItemsAdder item ignored | Ensure the camera section is correctly indented and the mechanic is spelled exactly camera. |
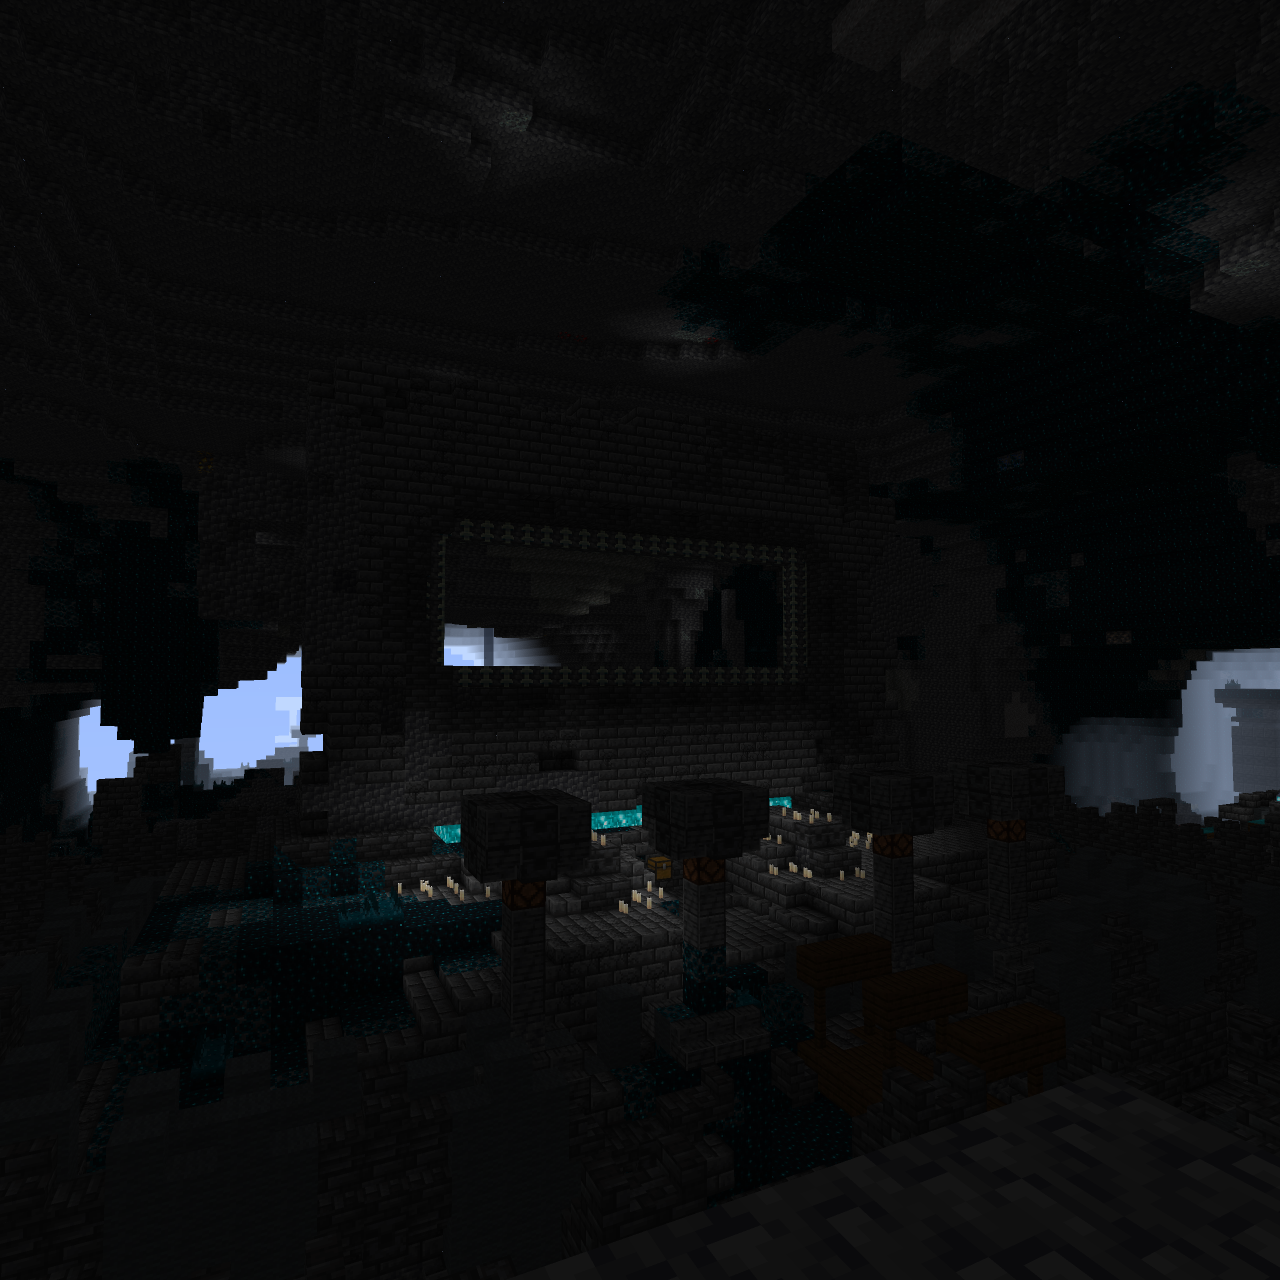
Screenshots
Gallery
-
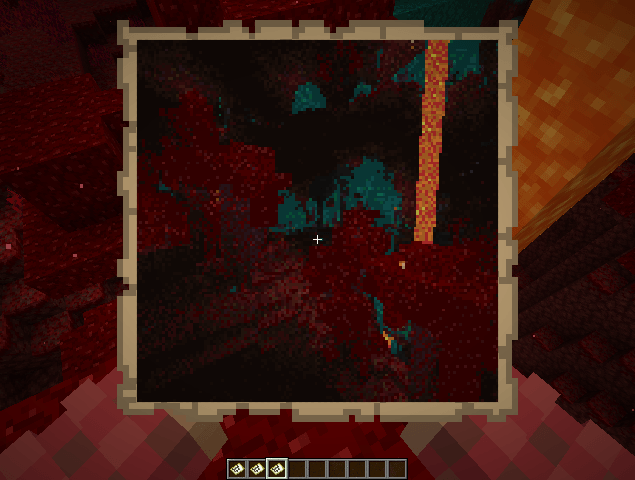
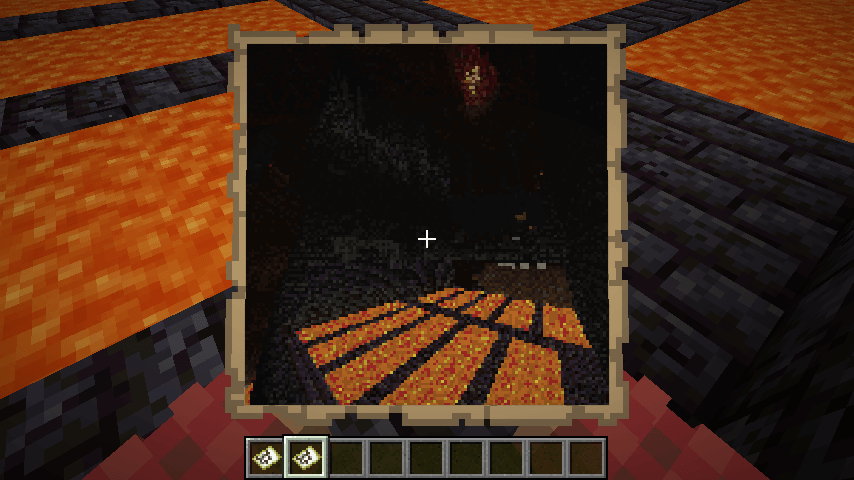 Nether Example Nether Example
 -
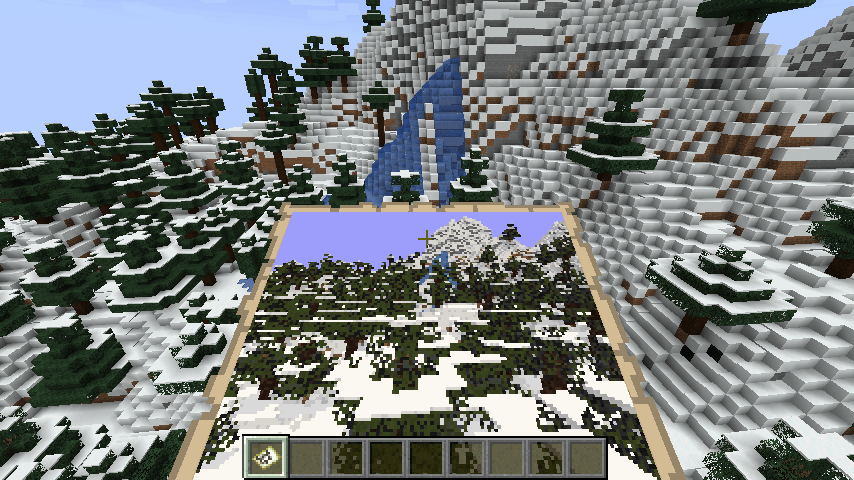
 Nether Example 2 Nether Example 2
 -
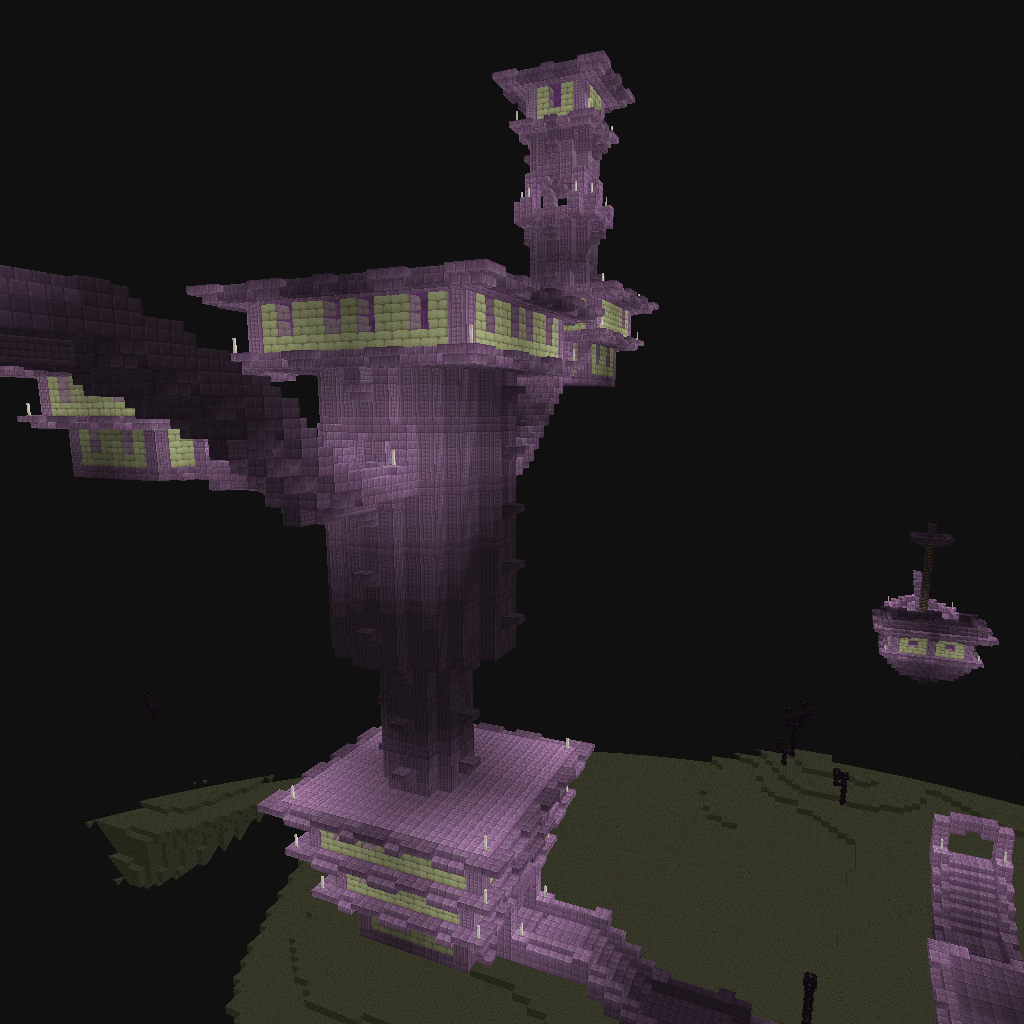
 Example Example
 -
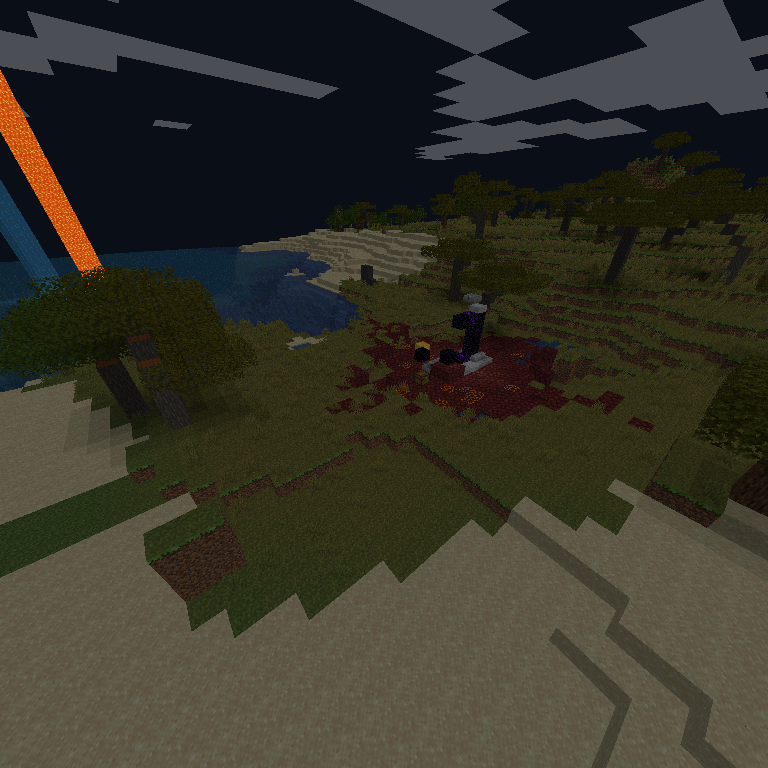
 PNG render of End City PNG render of End City
 -
 PNG render with biome blend PNG render with biome blend
 -
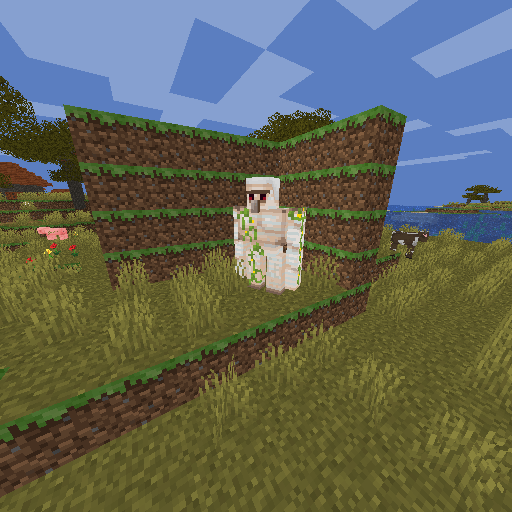 PNG render with experimental entity rendering PNG render with experimental entity rendering
 -
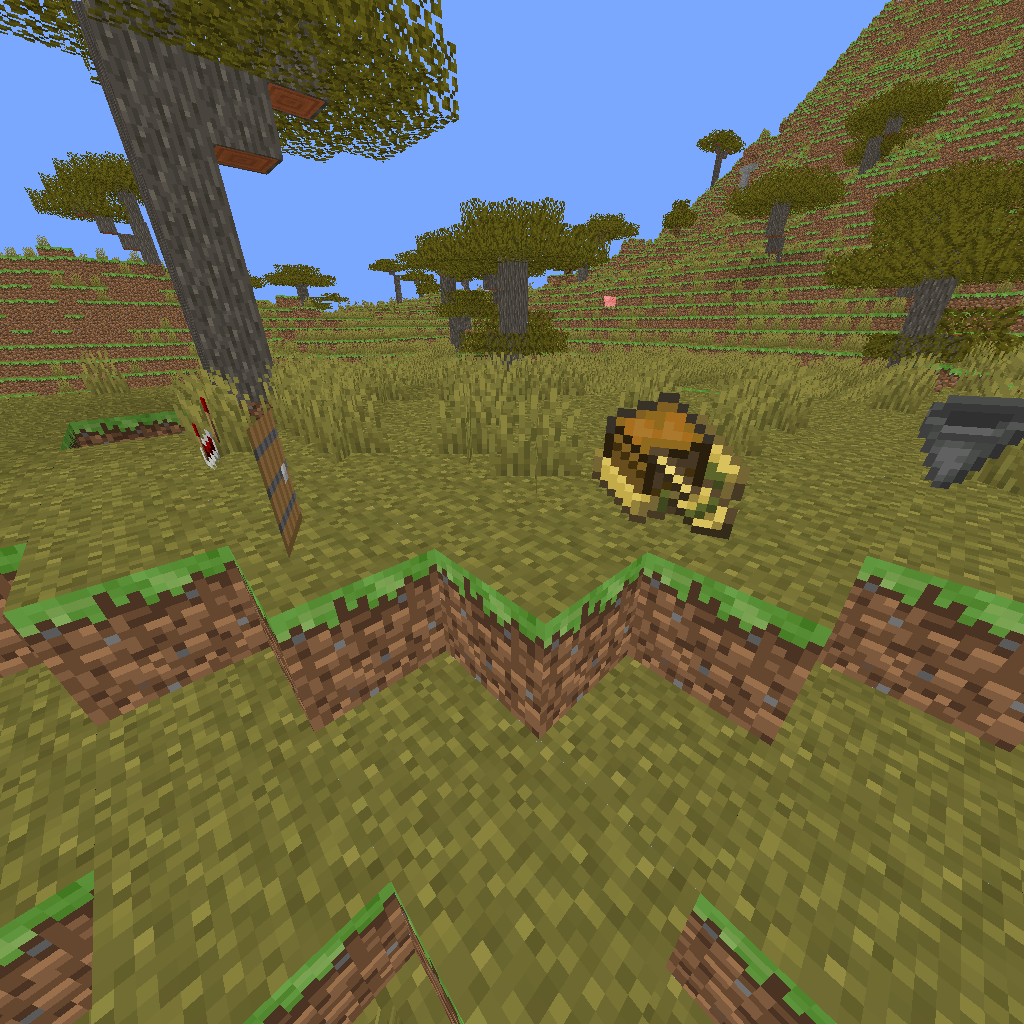 PNG render with item entities PNG render with item entities
 -
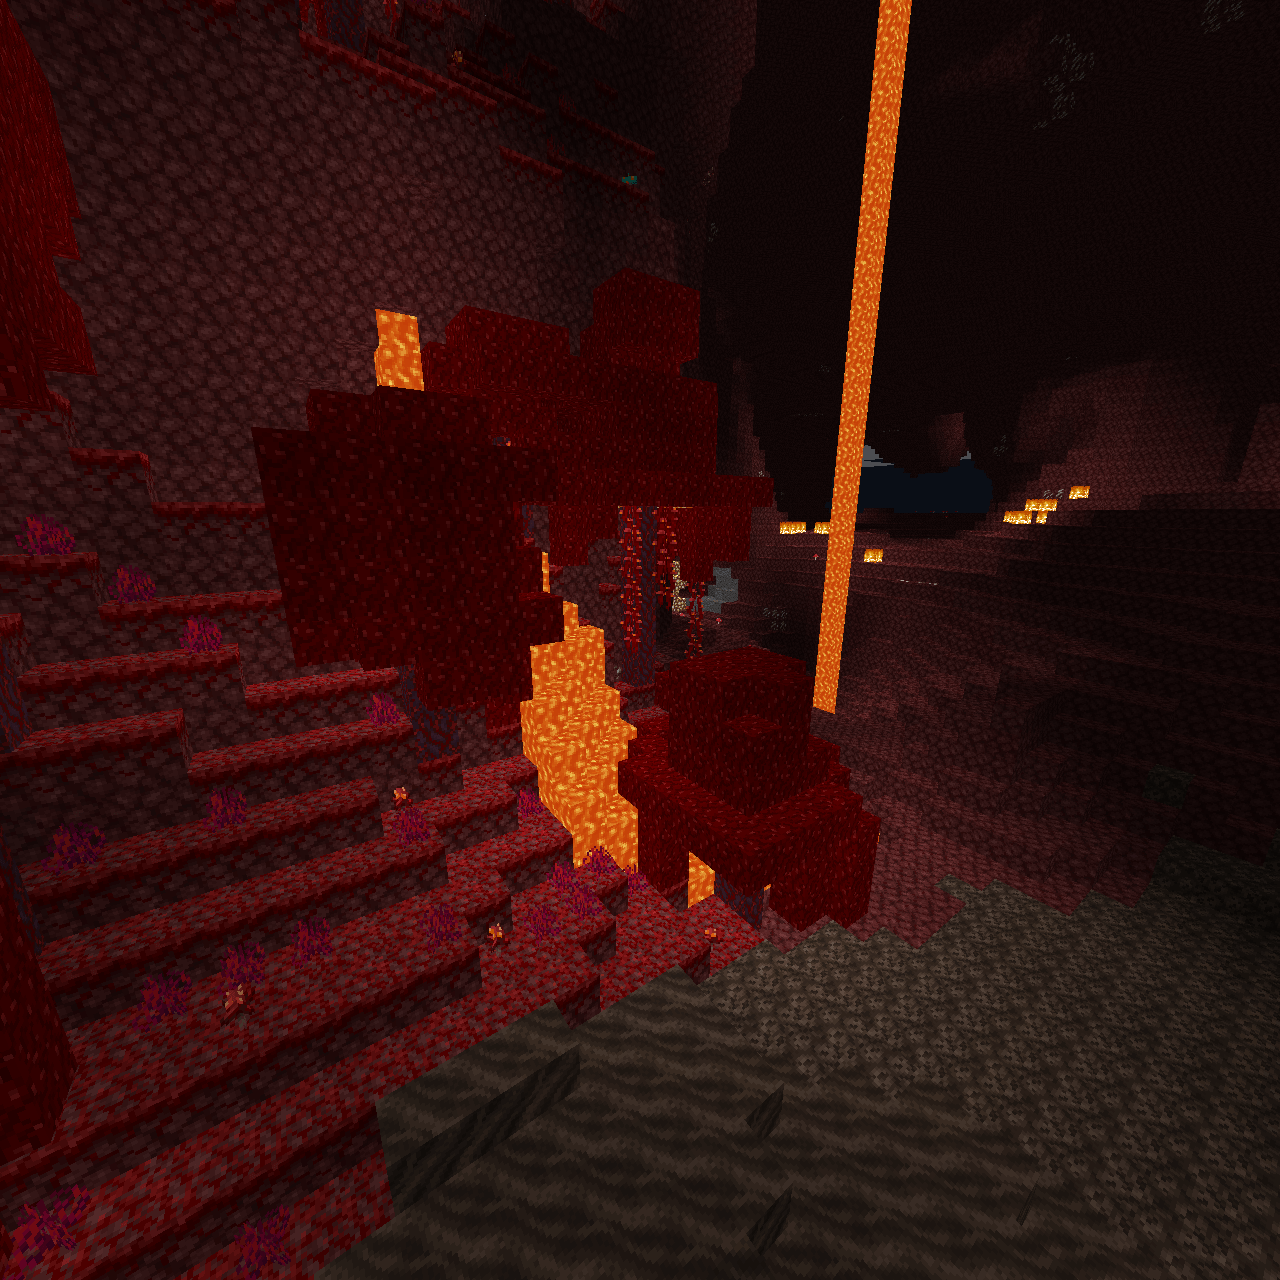 PNG render PNG render
-
Entity support
-
Version 2
-
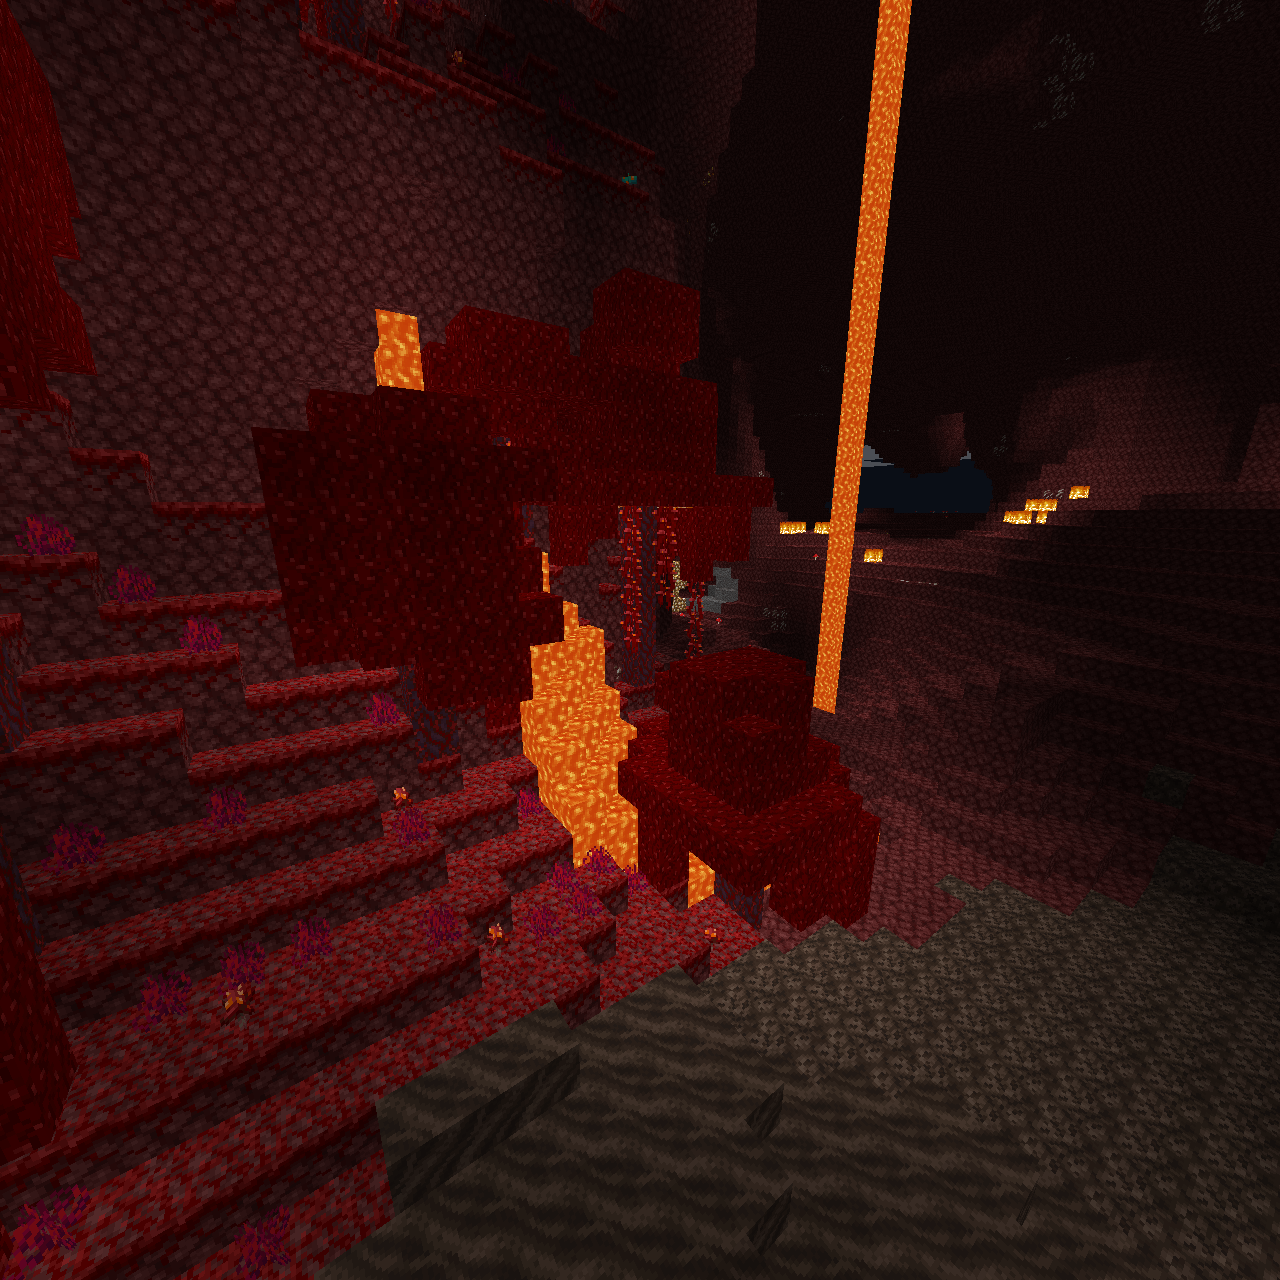 PNG render
 -
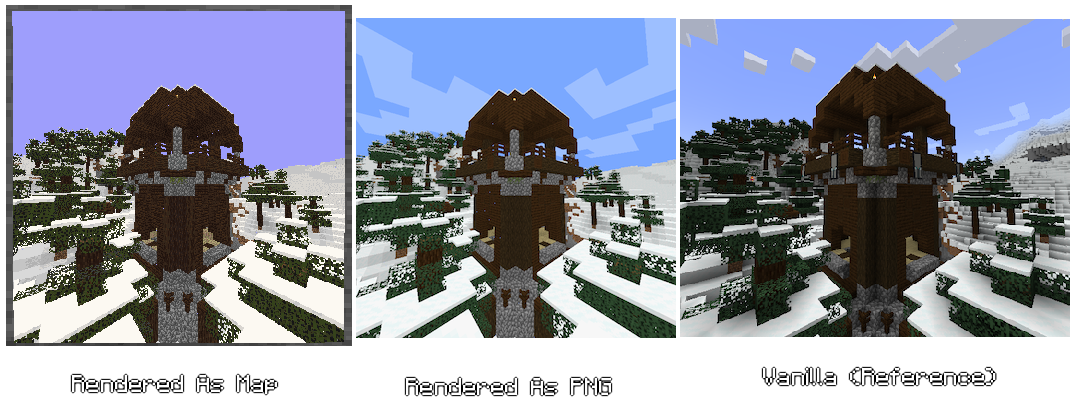 Comparison
 -
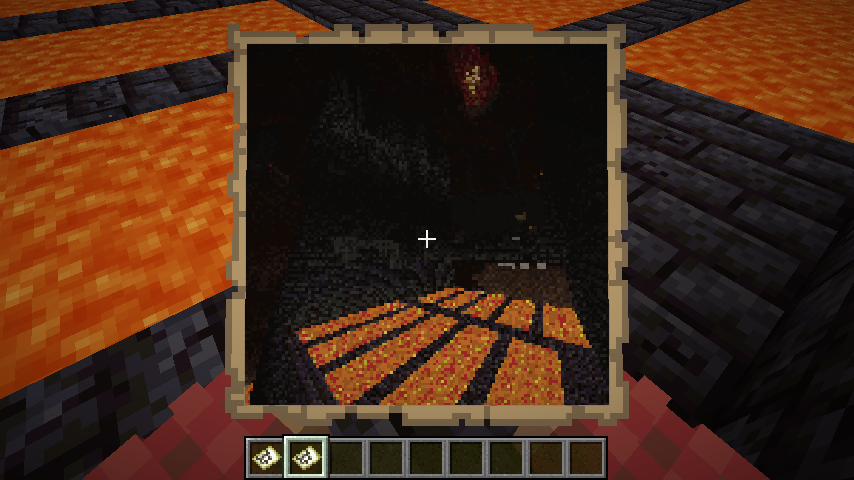 Nether Example
 -
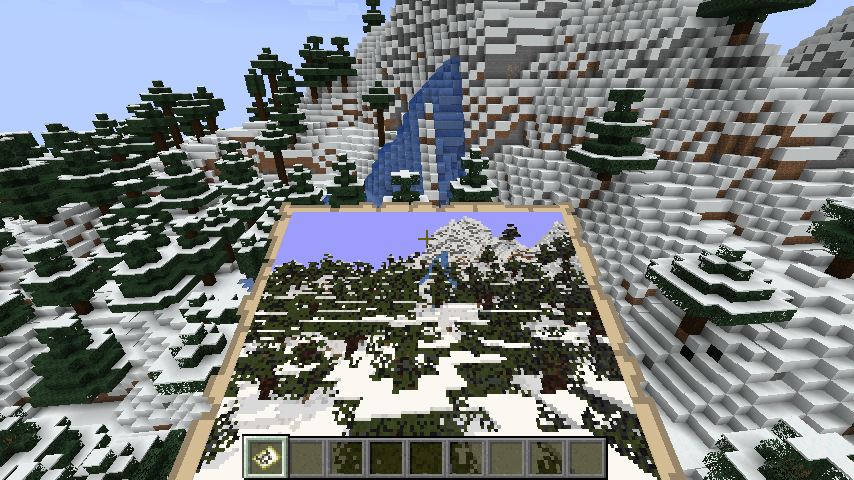 Example
 -
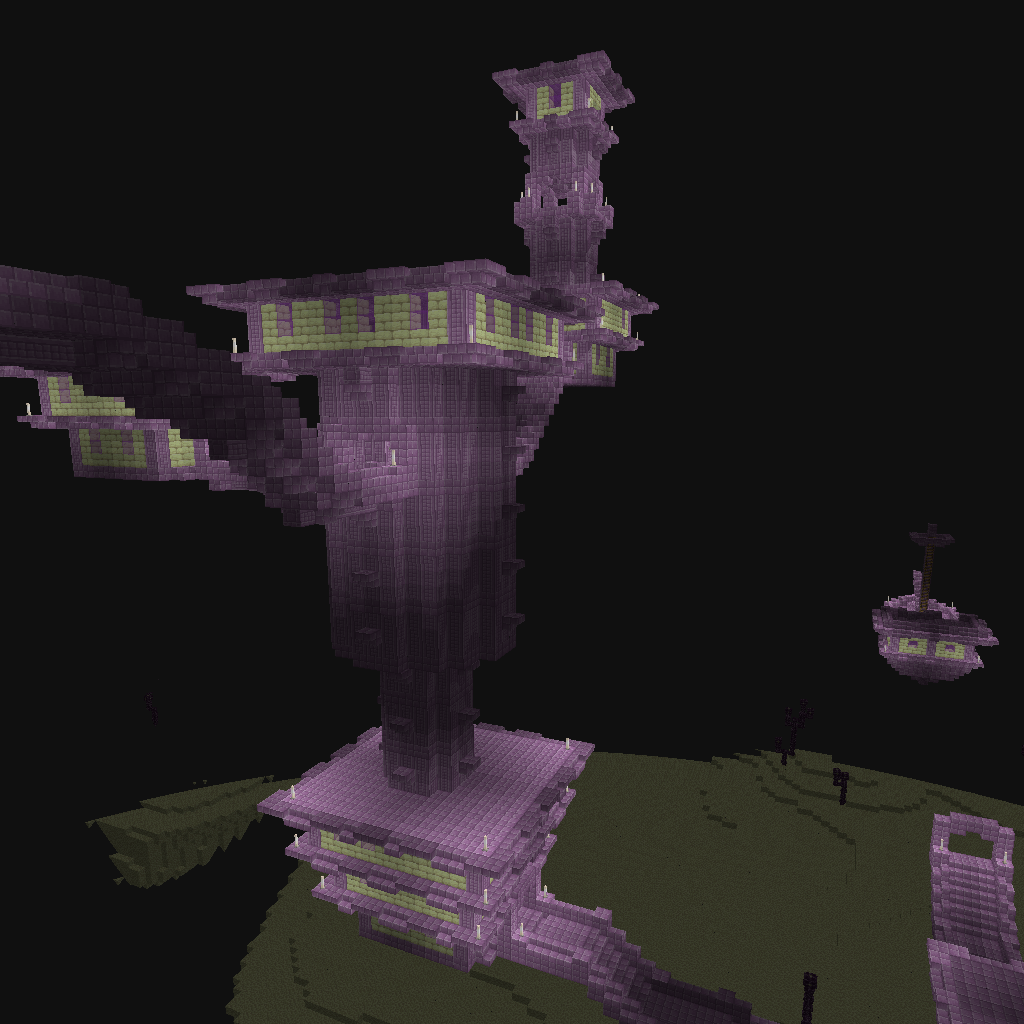 PNG render of End City
 -
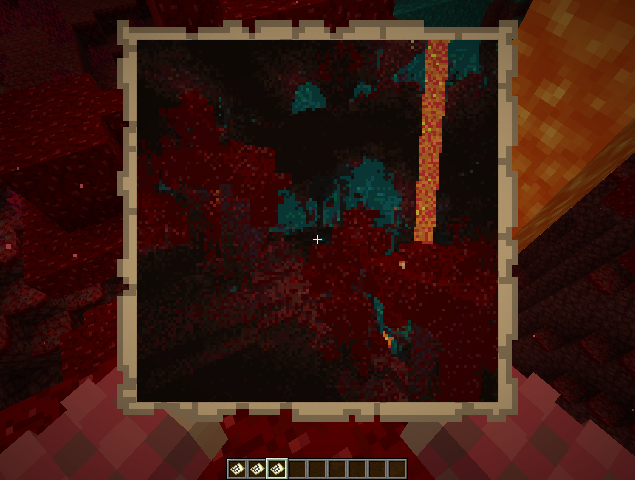 Nether Example 2
 -
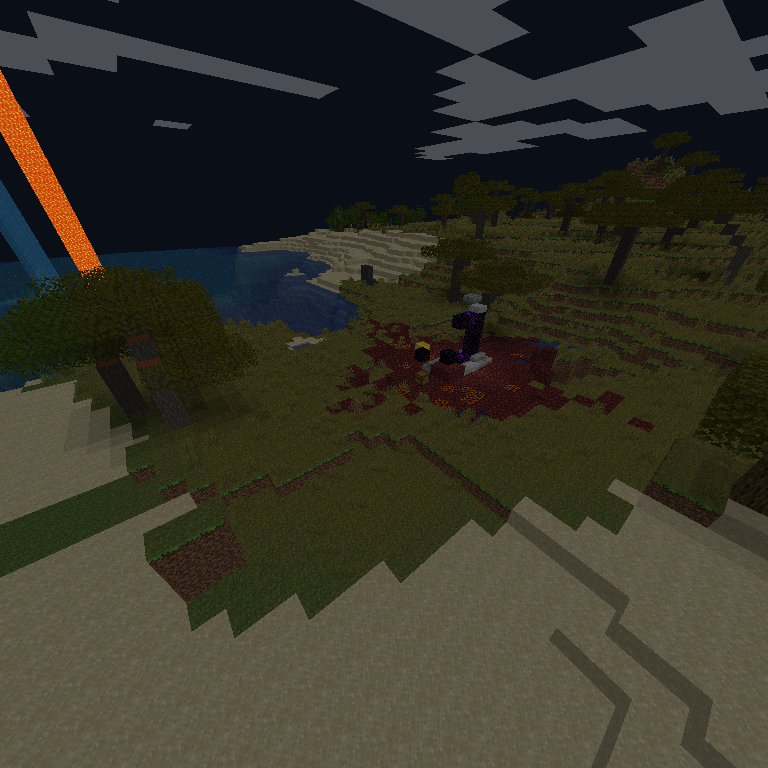 PNG render with biome blend
Versions
Files
Relations
Project Relations
More like this
Similar Mods
Suggestions use data such as tags, dependencies, dependents, descriptions, titles, and more to rank how much they overlap with this mod.
On ModDex
Community snapshot
By the numbers
Statistics
 (opens in a new tab)
Get it on
Available Platforms
On ModDex
Community snapshot
By the numbers